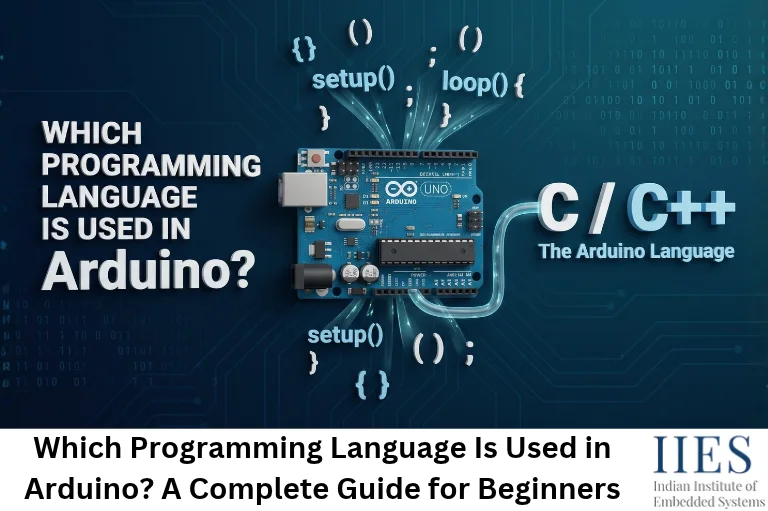
Is the “Arduino Language” a Separate Programming Language?
No. There is no standalone Arduino compiler or syntax. Think of the “Arduino language” as C++ wearing a friendly jacket.
- What it really is: standard C++ plus the Arduino core library, which gives you ready-made functions like
pinMode(), digitalWrite(), analogRead() and Serial.println() - What the IDE adds quietly: it includes
Arduino.h for you, generates function prototypes so you can call a function before defining it, and wraps your code in a hidden main() - What you can still do: use pointers, structs, classes, macros, bitwise operators and inline assembly, exactly as in any C/C++ project
- Why this matters: every Arduino concept you master is real C/C++ that carries over to STM32, ESP32, PIC and professional firmware work

What Does Arduino Code Look Like? The Blink Sketch
Every sketch needs two functions: setup() and loop(). Here is the classic Blink example, which makes the onboard LED flash:
void setup() {
  pinMode(LED_BUILTIN, OUTPUT);  // runs once at power-up or reset
}

void loop() {
  digitalWrite(LED_BUILTIN, HIGH);  // LED on
  delay(1000);                      // wait 1000 ms
  digitalWrite(LED_BUILTIN, LOW);   // LED off
  delay(1000);                      // wait 1000 ms
}
Reading the sketch line by line
Let’s decode what each piece does:
setup() runs once when the board powers up or resets. Use it for pin modes, Serial.begin() and sensor initialization.loop() runs forever, over and over. Your main logic lives here.pinMode() tells the microcontroller whether a pin is an input or an output.digitalWrite() drives a pin HIGH (the board’s logic voltage) or LOW (0 V).delay() pauses the program for the given number of milliseconds.
The hidden main() function
Spot anything missing? There is no main(), yet every C and C++ program starts there. Arduino tucks it inside the core library. Here is a simplified view:
// Simplified view of what the Arduino core runs for you
int main(void) {
  init();       // configure timers, ADC and other core hardware
  setup();      // your one-time setup code
  for (;;) {    // endless loop
    loop();     // your repeating code
  }
  return 0;
}
- This is the classic super-loop pattern used in countless bare-metal embedded products.
- It explains why every sketch must define both
setup() and loop(). - It also proves Arduino code is plain C++: it all ends up inside an ordinary
main().
Why Arduino Uses C/C++ Instead of Python or Java
The reason is simple: microcontrollers have very little memory and need fast, predictable code. Once you understand how a microcontroller works (flash, SRAM, registers and peripherals), the choice makes sense.
- Tiny memory: the Arduino Uno R3’s ATmega328P has just 32 KB of flash and 2 KB of SRAM. A full Python interpreter will not fit.
- Speed: C/C++ compiles to compact machine code that runs directly on the chip, with no interpreter in between.
- Hardware control: pointers, bit manipulation and direct register access are built into the language.
- Predictable timing: no garbage collector pausing your program in the middle of a sensor read or a UART transfer.
- One toolchain, many chips: GCC-based toolchains cover AVR, Arm Cortex-M and ESP32 targets, so the same language works across boards.
- Career relevance: most production firmware in cars, medical devices and industrial controllers is written in C or C++.
What Happens When You Click Upload?
In one line: the IDE converts your sketch into C++, compiles it with GCC and sends the machine code to the board over USB. Think of it as a relay race with six runners (shown here for an AVR board such as the Uno R3):
- Preprocessing: the IDE merges your
.ino files into one C++ file, adds #include and generates function prototypes. - Compiling:
avr-g++ and avr-gcc turn your code, the libraries you included and the Arduino core into object files. - Linking: the linker combines everything into a single
.elf file. - Converting:
avr-objcopy extracts a .hex file containing the final machine code. - Uploading:
avrdude sends the .hex file over USB, and the bootloader writes it into flash memory. - Running: the chip resets, runs
main(), calls setup() once and then repeats loop() forever.
Pro tip: want to watch the relay race? Open the IDE preferences (Settings on macOS), turn on verbose output for compilation and upload, then press Upload. You’ll see the real avr-g++ and avrdude commands scroll past.
Other chip families use their own compilers and uploaders (such as Arm GCC and esptool), but the flow stays the same.
Arduino Code vs Embedded C: One LED, Two Styles
Arduino code is C++ with a friendly layer, and embedded C is the same family of languages used closer to the hardware. You can mix both in a single sketch. Here is Blink again, this time talking to the ATmega328P’s registers directly (Uno R3 and Nano):
// Register-level blink (ATmega328P: Uno R3, Nano)
void setup() {
  DDRB |= (1 << DDB5);  // PB5 (Arduino pin 13) as output
}

void loop() {
  PORTB ^= (1 << PORTB5);  // toggle PB5
  delay(1000);
}
- Arduino API style: readable and portable across boards, but each
digitalWrite() does extra work (pin lookup and safety checks), so it is slower and uses more flash. - Register style: very fast and compact, but tied to one chip family.
- The takeaway: both compile in the same sketch because it is all C++. Arduino never locks you out of the hardware, it just offers a shortcut.
- Heads-up:
DDRB and PORTB are AVR names. An ESP32 or STM32 board uses different registers, so this exact code will not move across.
C vs C++ in Arduino: What You Actually Use
Wondering how much of each language shows up in a real sketch? Here is the breakdown.
C features you will use every day
- Variables and data types:
int, float, char, byte, bool - Control flow:
if/else, for, while, switch - Functions, arrays and
struct - Pointers, especially for passing buffers into functions
- Bitwise operators (
&, |, ^, ~, <<, >>) for flags and registers - Preprocessor directives:
#define, #include, #ifdef
C++ features hiding in plain sight
- Classes and objects:
Serial, Servo, Wire and LiquidCrystal are objects with methods. Serial.begin(9600) is a method call. - Constructors:
LiquidCrystal lcd(12, 11, 5, 4, 3, 2); creates an object and passes its pin settings in one line. - Function overloading:
Serial.print() accepts integers, floats, characters and strings. - Default arguments and references: common inside library code.
What is limited or missing
- No full standard library on classic AVR boards: no
std::vector or std::string out of the box. Arm and ESP32 based cores generally give you far more. - Exceptions are usually disabled, so error handling relies on return codes.
- Dynamic memory is risky:
new, malloc() and the String class can fragment the tiny heap on a 2 KB board.
Essential Arduino Functions at a Glance
| pinMode(pin, mode) | Sets a pin as INPUT, OUTPUT or INPUT_PULLUP | pinMode(7, INPUT_PULLUP); |
| digitalWrite(pin, value) | Drives a digital pin HIGH or LOW | digitalWrite(13, HIGH); |
| digitalRead(pin) | Reads HIGH or LOW from a pin | int state = digitalRead(2); |
| analogRead(pin) | Reads an analog voltage (0 to 1023 on the Uno’s 10-bit ADC) | int raw = analogRead(A0); |
| analogWrite(pin, value) | Outputs PWM (0 to 255) on supported pins | analogWrite(9, 128); |
| delay(ms) | Pauses the program (blocking) | delay(500); |
| millis() | Milliseconds since the board started | unsigned long t = millis(); |
| Serial.begin(baud) | Starts serial communication for debugging | Serial.begin(9600); |
Same Language, Different Rules: How Your Board Changes the Code
The language stays C/C++, but data type sizes and memory limits change with the chip. For the full picture, see data types in C++.
int size: 16 bits on classic AVR boards (Uno R3, Nano, Mega) and 32 bits on Arm and ESP32 based boards (Uno R4, Due, Nano ESP32). So int count = 40000; overflows on an Uno R3 but works on an Uno R4.double precision: same as float (32 bits) on AVR, but 64 bits on most 32-bit boards.- Memory: an Uno R3 has 2 KB of SRAM, an Uno R4 has 32 KB, and ESP32 based boards have hundreds of kilobytes.
- The fix: use fixed-width types such as
uint8_t, int16_t and uint32_t. They mean the same thing on every board.

Can You Use Other Programming Languages With Arduino?
Yes, with one distinction. Some languages run on the board, while others run on your computer and only talk to the board.
Languages that run on the board
- C/C++: the default, and the most widely supported option on every Arduino board.
- MicroPython: officially available on selected boards, including the Nano ESP32, Nano RP2040 Connect, Nano 33 BLE, Nicla Vision, GIGA R1 WiFi, Portenta H7 and Portenta C33, using Arduino Lab for MicroPython. It is not practical on the classic Uno because of its 2 KB of SRAM.
- Python on the Arduino UNO Q: this newer board pairs a Linux-capable Qualcomm processor with an STM32 microcontroller. Python runs on the Linux side, a normal C++ sketch runs on the microcontroller side, and a Bridge library connects them. You build both in Arduino App Lab.
- Assembly: inline
asm for timing-critical routines. - Rust: community projects can target AVR boards such as the Uno, though the tooling is still niche.
- Block-based editors: tools like the block editor in Tinkercad Circuits turn blocks into Arduino C++ behind the scenes.
For a wider look at the trade-offs, see Python in embedded systems.
Languages that run on your computer
- Python with pySerial or pyFirmata: your PC sends commands to the board over USB.
- JavaScript with Johnny-Five: Node.js talks to the board through Firmata.
- Processing, MATLAB and LabVIEW: common for plotting sensor data and building dashboards.
Important: in these setups the board still runs C++ firmware (for example, StandardFirmata). Your computer is remote-controlling it, not replacing it.
Which Language Does Each Arduino Board Use?
| Uno R3, Nano, Mega 2560 | AVR (8-bit) | C/C++ |
| Uno R4 Minima and WiFi | Renesas RA4M1 (Arm Cortex-M4) | C/C++ |
| Nano RP2040 Connect | RP2040 | C/C++ and MicroPython |
| Nano ESP32 | ESP32-S3 | C/C++ and MicroPython |
| GIGA R1 WiFi, Portenta H7 | STM32H747 (dual-core) | C/C++ and MicroPython |
| UNO Q | Qualcomm QRB2210 + STM32U585 | C/C++ (microcontroller side) and Python (Linux side) |
Board support keeps growing, so check Arduino’s documentation before you buy. If you are still choosing a first board, read which Arduino board is best for beginners.
Do You Need to Know C/C++ Before You Start?
No. A few functions and a breadboard are enough to begin. When you want to go deeper, this path works well, and C programming from basic to advanced covers the language side step by step:
- Basics: variables, data types and operators
- Control flow:
if/else, loops and switch - Functions and arrays: reusable code and sensor data handling
- Libraries and objects:
Servo, Wire, SPI and Serial - Non-blocking code:
millis(), state machines and interrupts instead of delay() - Hardware depth: timers, ADC, UART, I2C and SPI at register level
- Professional habits: embedded C best practices, RTOS basics and debugging with SWD or JTAG
7 Common Mistakes in Arduino C++ Code (and Quick Fixes)
- Skipping
pinMode(): the pin stays an input, so your LED stays dim or off. Set the mode in setup(). - Overusing
delay(): it freezes everything else. Use millis() for timing. - Storing
millis() in an int: a 16-bit int overflows after about 33 seconds. Use unsigned long, which wraps after roughly 49.7 days. - Typing
= instead of ==: if (x = 5) assigns instead of compares, so the condition is always true. - Forgetting
Serial.begin() or mismatching the baud rate: you get no output or garbled characters. - Overusing
String on small boards: it can fragment memory and cause odd resets. Prefer char arrays on AVR. - Missing semicolons or braces: the compiler often reports the error on the line after the real mistake.
- Arduino IDE 2.x: the easiest start, with autocomplete, a board manager, a library manager and debugging on supported boards
- Arduino Cloud Editor: browser-based, no installation needed
- VS Code with PlatformIO: better project structure and multi-board builds
- Arduino CLI: command-line builds for scripts and CI pipelines
- Wokwi and Tinkercad Circuits: simulators for testing logic before you touch hardware
Key Takeaways
- Arduino uses C and C++. The “Arduino language” is C++ plus a simple built-in API.
- Every sketch needs
setup() (runs once) and loop() (runs forever), wrapped by a hidden main(). - The IDE preprocesses your sketch, compiles it with GCC and uploads machine code through the bootloader.
- Python and MicroPython work on selected boards, but C/C++ remains the default across the ecosystem.
- Treat Arduino as a stepping stone: master C/C++, then explore registers, timers and communication protocols.

Conclusion: Start With Arduino, Think Like an Embedded Engineer
So, which programming language is used in Arduino? C++, with plain C welcome, wrapped in a friendly API that lets you blink an LED in minutes. Keep peeking under the hood, and the same skills will carry you to STM32, ESP32 and professional firmware work.
- Next step: put these basics to work with how to connect multiple sensors to Arduino.
- Still deciding? Read the advantages and disadvantages of Arduino before you commit to a platform.
- Want structured practice? Build hands-on skills in embedded C, microcontrollers and IoT with training at the Indian Institute of Embedded Systems (IIES) in Bangalore.