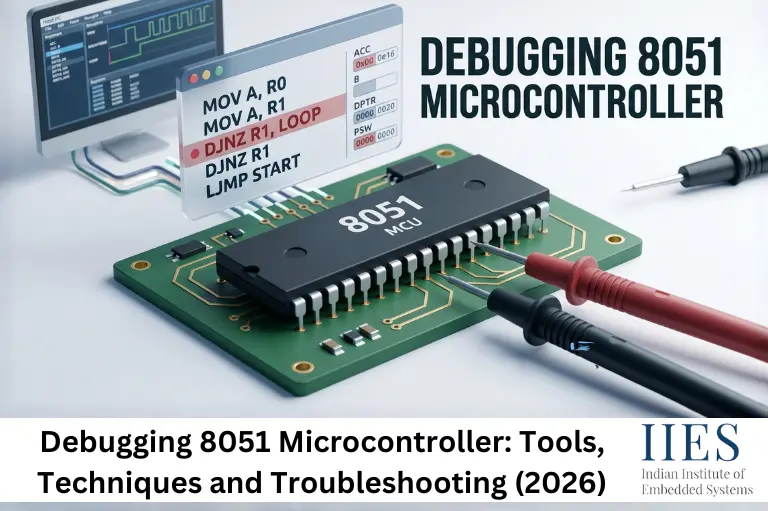
What Is Debugging in Microcontroller Systems?
Debugging definition: Debugging is the systematic process of identifying, isolating, analyzing, and correcting faults in hardware, software, or firmware.
In embedded systems, debugging extends beyond software because the firmware interacts directly with physical hardware. A bug may originate from source code, electrical noise, incorrect wiring, or peripheral timing issues.
Successful debugging requires engineers to evaluate the entire system rather than focusing only on the code.

What Is a Debugger in Microcontroller Development?
A microcontroller debugger is a hardware or software tool that helps developers observe program execution and investigate system behavior.
A debugger allows engineers to:
- Execute code step by step
- Set breakpoints
- Monitor registers
- Inspect memory locations
- Track variable values
- Analyze execution flow
Without a debugger, troubleshooting often becomes a trial-and-error process.
Goals and Objectives of Debugging
The purpose of debugging goes far beyond fixing immediate issues.
The key objectives include:
- Identifying faults quickly
- Improving software reliability
- Reducing development time
- Preventing future failures
- Verifying hardware operation
- Ensuring predictable system behavior
From a real project standpoint, systematic debugging often saves more time than writing additional code because it eliminates repeated troubleshooting cycles.
Debugging is an essential part of 8051 microcontroller development. Since embedded systems involve both hardware and software working together, identifying the root cause of a problem can often be challenging. A small issue in the code, wiring, clock circuit, or peripheral configuration can lead to unexpected system behavior.
By applying structured debugging techniques, developers can quickly locate faults, improve system reliability, and reduce development time. The following sections cover practical methods and best practices for troubleshooting 8051 microcontroller projects, including hardware verification, software debugging, interrupt analysis, memory monitoring, and the use of debugging tools.
Before beginning any debugging activity, it is important to understand the internal architecture of the 8051 microcontroller.
Become familiar with:
- Arithmetic Logic Unit (ALU)
- Timers and counters
- Input/output ports
- Internal RAM and ROM
- External memory interfaces
- Interrupt handling mechanisms
Understanding these building blocks helps identify which subsystem is responsible when a fault occurs.
Check the Connections and Power Supply
One of the most overlooked causes of embedded system failures is an unstable power source.
Verify the following:
- Correct operating voltage
- Proper ground connections
- Reliable sensor and peripheral wiring
- No loose jumper connections
A digital multimeter is often the first tool used during troubleshooting because many failures originate from simple hardware issues.
Examine the Clock Signal
The 8051 requires a stable clock signal for proper operation.
Check that:
- The crystal oscillator is functioning correctly
- The oscillator circuit is properly connected
- The clock frequency matches application requirements
Use an oscilloscope to verify the signal at the XTAL pins.
Monitor the Reset Pin
The reset circuit initializes the microcontroller during startup.
Verify:
- Reset pulse duration
- Proper reset voltage levels
- Stable reset circuitry
A faulty reset signal can prevent the microcontroller from booting correctly.
Use a Debugging Interface
A debugging interface helps monitor program execution and variable values.
Common options include:
- UART debugging
- Serial monitors
- In-circuit debuggers
- In-circuit emulators
UART debugging is particularly useful because it allows runtime information to be sent directly to a computer.
Check for Logic Errors in the Code
Logic errors are among the most difficult bugs to identify because the code compiles successfully but behaves incorrectly.
Inspect:
- Register configurations
- Conditional statements
- Loop structures
- Interrupt Service Routines (ISRs)
- Variable initialization
Using step-by-step debugging can help locate the exact point where execution deviates from expectations.
Examine I/O Port Configuration
Misconfigured ports frequently cause communication failures.
Verify:
- Port direction settings
- Pin assignments
- Pull-up resistor requirements
- Peripheral connections
Monitor Memory Usage
Memory-related problems can create unpredictable behavior.
Watch for:
- Memory overflow
- Stack overflow
- Memory corruption
- Incorrect memory addressing
These issues often appear in larger projects with multiple functions and interrupts.
Use Software and Hardware Breakpoints
Breakpoints allow developers to pause execution and inspect the system state.
Benefits include:
- Register inspection
- Variable monitoring
- Memory analysis
- Program flow verification
Verify Timers and Interrupts
Incorrect timer settings or interrupt configurations can lead to timing errors and system instability.
Check:
- Interrupt vectors
- ISR implementation
- Timer modes
- Interrupt priorities
Verify the Program Counter (PC)
The Program Counter tracks the current instruction being executed.
If the PC becomes stuck or jumps unexpectedly, the issue may involve:
- Infinite loops
- Corrupted memory
- Faulty branch instructions
Examine External Components
The problem may originate outside the microcontroller.
Inspect:
- Sensors
- LCD displays
- Motor drivers
- Communication modules
Always verify external hardware before modifying firmware.
Use Simulation Tools
Simulation tools allow developers to test applications before deploying them to hardware.
Popular tools include:
- Proteus
- Keil uVision Debugger
- Multisim
Simulation often identifies configuration and logic issues early in development.
Verify Timing and Delays
Timing problems can cause communication failures and missed events.
Verify:
- Delay routines
- Timer calculations
- Signal timing requirements
- Peripheral response times
What Are the Common Debugging Challenges in 8051 Microcontroller Projects?
Hardware Challenges
Common hardware-related issues include:
- Poor solder joints
- Loose connections
- Grounding problems
- Power supply instability
- Oscillator failures
Software Challenges
Typical software issues include:
- Infinite loops
- Incorrect register settings
- Stack overflow
- Memory overflow
- Faulty interrupt handling
Communication Challenges
Communication interfaces frequently create troubleshooting difficulties.
Examples include:
- UART baud-rate mismatches
- I2C addressing errors
- SPI timing issues
Many beginners assume that successful compilation guarantees a working system. In practice, embedded failures often occur after the firmware is loaded onto hardware.
Explain the Various Programming and Debugging Tools in 8051 Microcontroller Systems
Tool | Purpose | Application |
Keil uVision Debugger | Software debugging | Register and memory analysis |
Proteus | Simulation | Virtual hardware testing |
Oscilloscope | Signal monitoring | Clock and waveform verification |
Logic Analyzer | Digital signal analysis | Protocol debugging |
UART Terminal | Runtime monitoring | Serial communication debugging |
Multimeter | Electrical testing | Voltage and continuity checks |
In-Circuit Emulator (ICE) | Advanced debugging | Real-time system analysis |
In-Circuit Debugger (ICD) | Firmware inspection | Breakpoint-based debugging |
These tools form the foundation of professional troubleshooting workflows.

Step-by-Step Debugging of 8051 Microcontroller Projects
Following a structured workflow helps locate faults faster.
Step 1: Verify Power Supply
Confirm correct voltage levels and grounding.
Step 2: Check Clock Signal
Ensure the crystal oscillator is functioning correctly.
Step 3: Validate Reset Circuit
Confirm that the reset pulse is generated properly.
Step 4: Inspect Peripheral Connections
Check displays, sensors, relays, and communication modules.
Step 5: Use UART Debugging
Transmit variable values and status information to a PC.
Step 6: Analyze Memory Usage
Monitor RAM utilization and stack growth.
Step 7: Apply Breakpoints
Pause execution and inspect internal states.
Step 8: Verify Interrupt Operation
Ensure interrupts trigger and execute correctly.
Step 9: Monitor Program Flow
Check whether the Program Counter follows expected execution paths.
Step 10: Perform Hardware Testing
Validate all external circuitry independently.
UART Debugging Example for 8051
UART debugging is one of the simplest and most effective debugging techniques available.
#include

void main()

{
    SBUF = 'A';      // Send a test character

    while(TI == 0);  // Wait for transmission

    TI = 0;

    while(1);
}
This code transmits the character “A” through the serial port, allowing developers to verify UART configuration and communication functionality.
Essential Debugging Tools Every Embedded Engineer Should Know
Professional engineers rarely rely on a single tool.
A practical debugging toolkit should include:
- Digital multimeter
- Oscilloscope
- Logic analyzer
- UART terminal software
- Simulation software
- Hardware debugger
- Protocol analyzer
In embedded systems laboratories, oscilloscopes frequently reveal faults that cannot be detected through software debugging alone.
Advanced Debugging Strategies for Embedded Systems
As projects become larger and more complex, advanced debugging methods become increasingly valuable.
Trace-Based Debugging
Records execution history for later analysis.
Event Logging
Captures critical runtime events.
Fault Injection Testing
Introduces controlled errors to evaluate system robustness.
Boundary Testing
Tests operation at minimum and maximum limits.
Regression Testing
Ensures new modifications do not break existing functionality.
These techniques are commonly used in industrial automation, automotive electronics, and IoT products.
Best Practices for Sustainable Debugging
Effective debugging should become part of the development process.
Recommended practices include:
- Maintain version control
- Use meaningful variable names
- Document hardware revisions
- Keep detailed test records
- Test modules independently
- Review interrupt configurations carefully
- Separate debugging code from production firmware
Teams that adopt structured debugging procedures typically experience fewer integration issues.
3 Common Mistakes When Troubleshooting 8051 Embedded Systems
Ignoring Hardware Verification
Many developers start rewriting code before checking hardware connections.
Excessive Use of Delay Loops
Heavy reliance on software delays often creates timing-related issues.
Changing Multiple Variables Simultaneously
Modifying several parameters at once makes root-cause identification difficult.
Always isolate one issue before proceeding to the next.
Real-World Example of Debugging in Embedded Systems
Consider an industrial temperature monitoring system using an 8051 microcontroller, an LCD display, and UART communication.
The system occasionally stops transmitting sensor readings. Many developers initially suspect firmware issues. However, oscilloscope analysis often reveals an unstable clock oscillator causing UART timing errors.
This example demonstrates why hardware verification should always accompany software troubleshooting.
Debugging Techniques for Embedded Systems
Although modern embedded products increasingly use ARM Cortex-M processors, the fundamental principles of debugging remain unchanged.
Current industry trends include:
- AI-assisted code analysis
- Automated test frameworks
- Enhanced simulation environments
- Hardware-in-the-loop testing
- Cloud-based debugging workflows
Engineers who master debugging on the 8051 platform often transition more effectively to modern microcontroller architectures because the underlying troubleshooting methodology remains consistent.

Conclusion
Debugging 8051 Microcontroller projects requires a systematic approach that combines software analysis, hardware testing, and effective use of debugging tools. By understanding the architecture of the 8051, verifying power and clock signals, monitoring memory usage, testing interrupts, and utilizing tools such as UART debugging, oscilloscopes, and simulators, developers can identify faults quickly and improve system reliability.
Whether you are a student learning embedded systems or an engineer maintaining industrial equipment, strong debugging skills remain essential for building dependable products and reducing development time.