Essential Elements
- Mega, Nano, or Uno Arduino
- Wi-Fi module ESP8266 (often used as ESP-01)
- 3V Regulator (an external 3.3V supply or AMS1117)
- Divider of voltage (for secure UART connection)
- Jumper wires with a breadboard
- USB cable (for programming an Arduino)
- An Arduino IDE-installed laptop or PC
Knowing the ESP8266
A low-cost Wi Fi microchip with full TCP/IP
stack and microcontroller functionality is the
ESP8266. It can be used with Arduino in two ways: Arduino acts as a Wi-Fi modem by instructing
the ESP8266 using AT instructions.
As a stand-alone MCU: Use the Arduino IDE to
directly program the ESP8266.
Method 1—using the ESP8266 as an Arduino modem is the
Main topic of this paper
Wiring Diagram (version ESP-01)
Caution: The ESP8266 requires 3.3V to function. Its VCC or communication pins should never receive 5V directly.
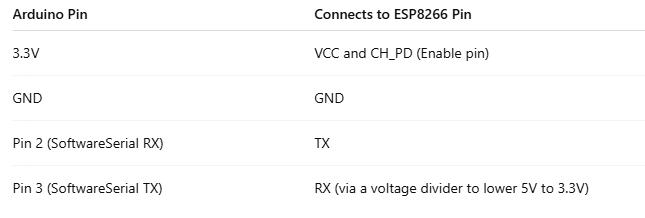
- The ESP8266 RX (3.3V) and Arduino TX (5V) require a logic level converter or a voltage divider
- Example of a Voltage Divider for Arduino TX to ESP8266 RX:
- Between the Arduino TX and the ESP RX, a 1kΩ resistor
- ESP RX to GND 2kΩ resistor
Notes on the Power Supply
- The ESP8266 needs a steady 3V and 200–300mA of current.
- The 3V output of the Arduino Uno might not be sufficient for current; use an additional 3.3V regulator, such as the AMS1117.
- To improve stability, use a 10µF capacitor near the ESP8266 module between VCC and
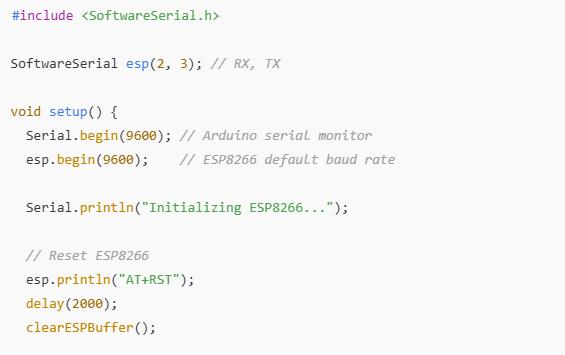
Code for Arduino
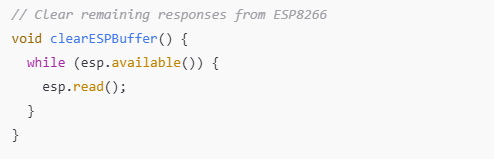
To interact with the ESP8266 without interfering with the Arduino’s primary serial port, we will utilize Software Serial.
Checking for Internet Access
An HTTP GET request can be sent once the ESP8266 is linked to Wi-Fi:
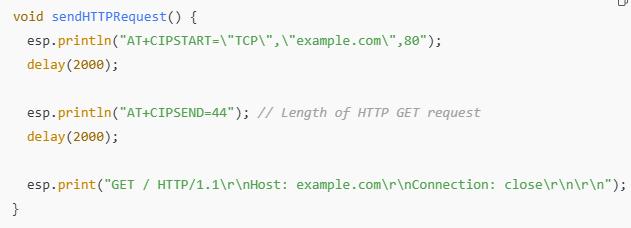
Check the Arduino Serial Monitor for the HTTP response after sending!
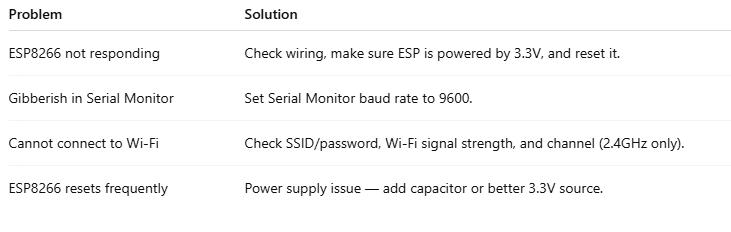
Solving Typical Problems
Final Notes:
Depending on the ESP8266 module, you can modify the default baud rate (e.g., 115200) by using AT+UART_DEF=9600,8,1,0,0
Improved Choice for Projects: If you intend to do a lot of Wi-Fi projects, think about utilizing a
NodeMCU or Wemos D1 Mini, in which the
ESP8266 serves as the whole microcontroller. Firmware Version: If you intend to use AT commands, make sure the AT firmware is installed on your ESP8266.
List of Helpful AT Commands AT
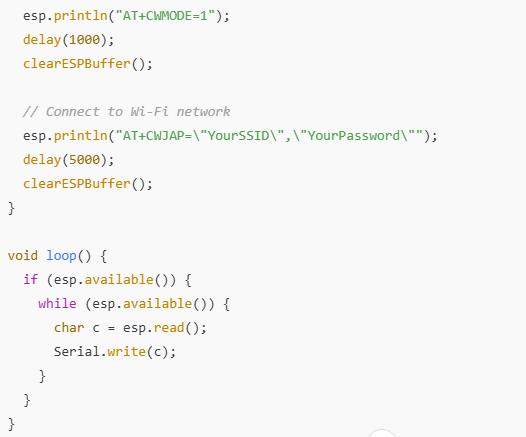
Verify that the module reacts AT+RST → Module reset Select “Station” as the Wi-Fi mode when
AT+CWMODE=1. AT+CWJAP=”SSID”,”Password” ⇒ Establish a Wi-Fi connection
Start a TCP connection using
AT+CIPSTART=”TCP”,”example.com”,80 AT+CIPSEND=length → Configure the send data length AT+CIPCLOSE → close relationship
Conclusion
After completing this tutorial, you ought to be able to: Connect the ESP8266 to the Arduino properly. To establish a Wi-Fi connection,
Send AT commands. Make simple internet requests, You can then
develop more intricate applications like home automation systems, IoT data loggers, or dashboards for remote monitoring!