Before diving into the practical aspects, let’s grasp the essence of Keil uVision 5. This IDE is your one-stop solution for embedded development. It provides an environment where you can write, compile, and debug your code seamlessly. Keil uVision 5 supports a wide range of microcontrollers and programming languages, making it versatile and adaptable to various project requirements. The IDE boasts an array of features and capabilities, such as a user-friendly interface, powerful debugging tools, and a rich set of libraries. These features simplify coding and help in producing efficient and reliable code for your embedded projects.
Setting Up Keil uVision 5
Starting out is frequently the hardest aspect of any quest. In this section, we will hold your hand through the setup process. We’ll provide detailed, step-by-step instructions for downloading and installing Keil uVision 5. To ensure a smooth setup, we’ll also outline the system requirements and offer troubleshooting tips for common installation issues. By the end of this section, you’ll have Keil uVision 5 installed and ready to use on your computer, and any roadblocks you encounter during the setup will be easily navigable.
Creating a New Project
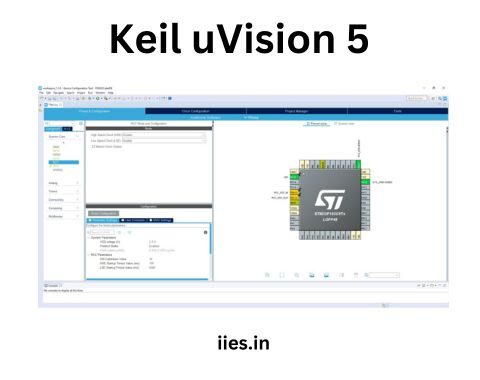
Once you have installed Keil uVision 5 on your computer and opened the application, you will be ready to start working on your project. The first step is to create a new project by selecting the appropriate microcontroller that you will be using for your project. This is an important decision as it will determine the specific features and capabilities that you will have at your disposal. Once you have selected the microcontroller, you will need to set up the necessary hardware for your project. This may involve connecting various components such as sensors, actuators, and other peripherals to your microcontroller. Don’t worry if you are unsure about how to do this, as we will guide you through the process, ensuring that you make the right choices that align with your project’s requirements. After setting up the hardware, it is crucial to configure your project correctly. This includes defining the necessary parameters such as clock frequency, memory allocation, and interrupt priorities. By doing so, you will ensure that your code runs flawlessly and efficiently on the target microcontroller. It is important to pay attention to these details, as even a small mistake in configuration can lead to unexpected behavior or performance issues in your project. Rest assured, we will provide you with step-by-step instructions and explanations to help you navigate through this process smoothly. So, let’s get started and create an amazing project using Keil uVision 5!
Writing and Compiling Code
Coding is the heart of any embedded project. In this section, we’ll introduce you to the programming language of your choice, whether it’s C, Assembly, or another language. You’ll learn how to write code efficiently within the Keil uVision 5 IDE. We’ll delve into the use of libraries and header files, explaining how they can make your life as a programmer easier. Once your code is written, you’ll discover the art of compiling and building your project with Keil uVision 5‘s built-in tools.
Debugging and Simulation
A critical aspect of any project is debugging and testing. It is crucial to ensure that your code is free from errors and functions as intended. Keil uVision 5, a popular integrated development environment (IDE), offers powerful debugging tools that can greatly assist you in this process. One of the key features of Keil uVision 5 is the ability to set breakpoints and watch variables. By setting breakpoints at specific lines of code, you can pause the execution of your program and examine the values of variables at that particular moment. This allows you to pinpoint the source of any issues or bugs and make necessary adjustments to your code.
Peripheral Configuration
Most embedded projects, which are projects involving the integration of hardware and software, often require working with various peripherals such as GPIO (General Purpose Input/Output), UART (Universal Asynchronous Receiver/Transmitter), and SPI (Serial Peripheral Interface). These peripherals play a crucial role in allowing the microcontroller or microprocessor to interact with external devices or modules. In this section, we will guide you through the process of configuring and utilizing these peripherals effectively in your projects. We understand that practical examples and real-world applications are essential to fully grasp their usage. Therefore, we will provide you with code snippets and explain how they can be applied in different scenarios. Whether you are controlling LEDs to create dazzling light displays, reading data from sensors for environmental monitoring, or establishing communication channels with other devices for data exchange, this comprehensive section will give you the information and direction you need. You can rely on the information presented here to successfully implement these peripherals in your embedded projects, enabling you to achieve your desired functionality and accomplish your project goals effectively.
Interrupts and Event Handling
Embedded systems, which are specialized computer systems designed to perform specific tasks, heavily depend on interrupts. Interrupts allow the system to efficiently handle events or tasks that require immediate attention. In this section, we will delve into the concept of interrupts and guide you through the process of working with them using Keil uVision 5, a popular integrated development environment (IDE) for embedded systems programming. Interrupts, in simple terms, are signals or events that temporarily halt the normal flow of program execution in order to address a higher-priority task. By utilizing interrupts, an embedded system can swiftly respond to important events without wasting valuable processing time.
Flashing and Running Code on Hardware
Now comes the exciting part of the development process – taking your code from the integrated development environment (IDE) and running it on actual hardware. This is where you get to see your project in action and witness your code come to life on physical hardware. We understand that this step can sometimes be intimidating, but don’t worry, we’ve got you covered. We will provide you with detailed instructions on how to flash your code to a microcontroller, making the process as smooth as possible. Additionally, this section will also cover real-world hardware connections, ensuring that you have all the necessary information to confidently run your project. With our guidance, you can proceed with confidence and be ready to marvel at your code running on tangible hardware.
Optimization and Troubleshooting
Every coder, regardless of their level of expertise, desires to create projects that are not just functional, but also efficient. They strive to minimize unnecessary steps and maximize resource utilization in order to achieve optimal performance. In this section, we are here to lend a helping hand by offering a plethora of tips and techniques that will aid you in optimizing your code. By implementing these strategies, you will be able to improve the efficiency of your projects and ensure that they run smoothly. Furthermore, we understand that even the most experienced developers face stumbling blocks along the way. Therefore, we are prepared to address common issues that you may encounter during your coding journey. Through our troubleshooting techniques, we will guide you back on track when the unexpected occurs and things don’t go according to plan. Rest assured, with our assistance, you will be equipped with the knowledge and tools necessary to overcome any obstacle and create code that is both efficient and effective.
Version Control and Collaboration
For those looking to take their projects to the next level and enhance their development workflow, we’ll delve into the world of version control integration with Keil uVision 5. In this comprehensive guide, you will learn how to effectively manage your codebase, collaborate seamlessly with others, and meticulously keep track of changes in your projects. By mastering version control, you will acquire a valuable skill that not only empowers you to streamline your development process but also opens up a plethora of opportunities for fruitful collaboration with fellow developers. So, let’s embark on this exciting journey and unlock the true potential of version control integration with Keil uVision 5.