What Is Arduino?
Arduino is an open-source electronics platform that pairs a programmable microcontroller board with free software, so you can read sensors, control motors and connect devices using simple C/C++ code, without deep hardware expertise.
Here is an easy way to picture it. A microcontroller is a tiny computer on a single chip. It reads inputs (a temperature sensor, a push button) and controls outputs (a fan, an LED, a motor). Arduino wraps that chip in a beginner-friendly package: ready-made pins, a USB port, power regulation, and software that hides the messy setup.
Every Arduino setup has three parts:
- Hardware: Boards such as the Arduino UNO, Nano and Mega. The classic UNO R3 is built around an 8-bit ATmega328P microcontroller.
- Software: The Arduino IDE (plus Arduino CLI and the web-based Cloud Editor), where you write programs called sketches in C/C++ using simple functions like pinMode(), digitalWrite() and analogRead().
- Ecosystem: Thousands of libraries, shields, example sketches and community projects to build on.

How an Arduino Sketch Runs
Every sketch has two core functions. setup() runs once when the board powers up, and loop() then repeats forever. Here is the classic Blink program:
void setup() {

  pinMode(LED_BUILTIN, OUTPUT);     // set the on-board LED pin as an output

}

void loop() {

  digitalWrite(LED_BUILTIN, HIGH);  // LED on

  delay(1000);                      // wait 1 second

  digitalWrite(LED_BUILTIN, LOW);   // LED off

  delay(1000);                      // wait 1 second

}
That is the whole program. No register setup, no clock configuration, no linker script. This simplicity is behind most advantages of Arduino and, as you will see later, behind a few of its disadvantages too.
Arduino UNO R3 at a Glance
| Specification | Arduino UNO R3 |
| Microcontroller | ATmega328P (8-bit AVR) |
| Clock speed | 16 MHz |
| Flash memory | 32 KB (about 0.5 KB used by the bootloader) |
| SRAM | 2 KB |
| EEPROM | 1 KB |
| Digital I/O pins | 14 (6 with PWM) |
| Analog inputs | 6 (10-bit ADC) |
| Logic level | 5 V |
Keep these numbers in mind. They explain almost every limitation discussed later.
Not every Arduino is an 8-bit board. The UNO R4 Minima moved to a 32-bit Arm Cortex-M4 (Renesas RA4M1) running at 48 MHz, with 256 KB of flash and 32 KB of SRAM. The newer UNO Q goes further and pairs a Linux-capable Qualcomm Dragonwing processor with an STM32 microcontroller on one board. It arrived alongside Qualcomm’s October 2025 announcement that it was acquiring Arduino. In this guide, classic boards means AVR-based boards such as the UNO R3, classic Nano and Mega 2560.
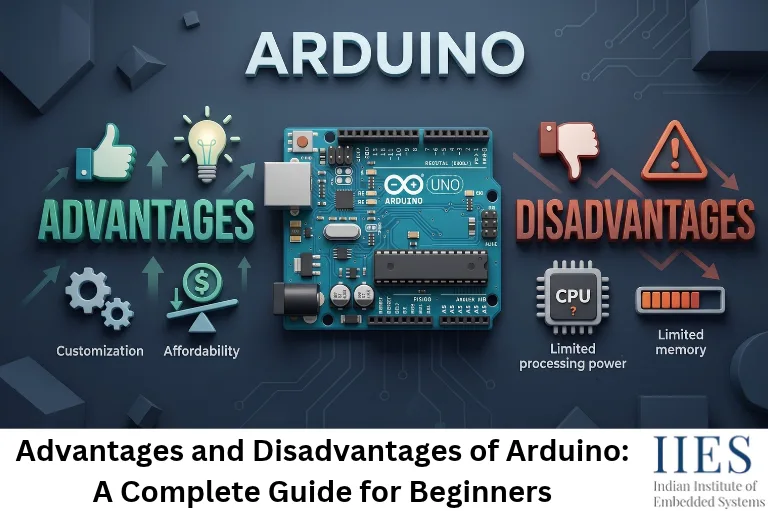
Advantages and Disadvantages of Arduino at a Glance
Short on time? Here is the snapshot. The sections after this explain the engineering reason behind each point.
| Advantages of Arduino | Disadvantages of Arduino |
| Easy to learn and beginner-friendly | Limited speed, RAM and flash (classic boards) |
| Low cost and easy to find | No built-in multitasking (classic boards) |
| Open-source hardware and software | Limited debugging tools |
| Free, cross-platform tools with easy USB upload | Not built for commercial products |
| Massive community and library support | Hides low-level embedded concepts |
| Fast prototyping with shields and modules | Fragile pins and voltage mismatches |
| Predictable, real-time-friendly control | Not optimized for low power |
| Wide range of boards | Limited connectivity and security (classic boards) |
| Strong foundation for embedded systems and IoT | Better-value alternatives now exist |
9 Advantages of Arduino
Each advantage below starts with the short answer, then gives the engineering reason behind it.
1. Arduino Is Easy to Learn and Beginner-Friendly
Arduino is easy to learn because its framework wraps low-level, register-level work in readable functions.
- digitalWrite(13, HIGH) is far easier to read than manually setting bits in the DDRB and PORTB registers.
- You write C/C++, so the skills carry over to other microcontrollers.
- Built-in examples (Blink, Fade, AnalogReadSerial) give you working code within minutes.
- Results are instant, such as a blinking LED or a live sensor value in the Serial Monitor, and quick wins keep motivation high.
Hands-on tip: Run the built-in examples on day one. Then change one value at a time and predict the result before you upload. That habit builds real understanding faster than copying finished projects.
2. Arduino Is Low-Cost and Easy to Find
Arduino is low-cost because the boards are simple and the designs are open.
- Entry-level boards and compatible clones are inexpensive, so a damaged pin is an annoyance, not a disaster.
- No separate programmer, debugger or paid software is needed. A USB cable and the free IDE are enough.
- Sensors, relay modules, displays and motor drivers are cheap and widely sold online and in local electronics markets.
- Official boards cost more than clones, but both run the same code.
3. Arduino Is Open-Source Hardware and Software
Arduino is open source, which means anyone can study, modify and build on its designs and code.
- Schematics and design files for many official boards are published, so the community builds compatible boards, from tiny breadboard modules to industrial-style variants.
- The IDE and core libraries are open source, so bugs get fixed and new board support arrives quickly.
- The same Arduino coding style now runs across many chip families, so you are not tied to one vendor’s toolchain.
4. Arduino Has Free, Cross-Platform Tools and Easy USB Uploads
Arduino tools are free, run on Windows, macOS and Linux, and upload code over a plain USB cable.
- Board Manager and Library Manager install board support and libraries in a few clicks.
- Serial Monitor and Serial Plotter show sensor values as text or as a live graph.
- A bootloader on the board accepts code over USB, so most boards need no separate hardware programmer.
- Arduino IDE 2.x adds autocompletion and a modern editor, and Arduino CLI lets you automate builds and uploads.
5. Arduino Has a Massive Community and Library Support
Arduino has one of the largest maker and engineering communities in electronics, so almost every common problem already has a documented answer.
- Thousands of libraries cover sensors, displays, motors, wireless modules and protocols.
- Active forums, Q&A sites and video tutorials mean you rarely debug alone.
- Libraries let you use a complex device, such as an OLED display or a GPS module, without writing the low-level driver yourself.
6. Arduino Enables Fast Prototyping with Shields and Modules
Arduino speeds up prototyping because you can plug hardware together and test an idea in hours, not weeks.
- Breadboards and jumper wires let you build and rebuild circuits without soldering.
- Shields and modules (Wi-Fi, Ethernet, motor drivers, displays) plug straight into the board.
- A proof of concept that would need a custom PCB can often be tested in a day or two.
Real example: An automatic plant-watering prototype needs only an Arduino, a soil-moisture sensor, a relay module and a small pump. You can have it working in an evening and refine the design later.
7. Arduino Gives Predictable, Real-Time-Friendly Control
Classic Arduino boards give predictable control because your code runs directly on the microcontroller, with no operating system in between.
- No background services compete for CPU time, so timing is more predictable than on a Linux board such as a Raspberry Pi.
- That suits jobs where response time matters: reacting to a sensor, generating PWM signals, driving stepper motors, counting encoder pulses.
- Timers, PWM and external interrupts are exposed through simple calls like analogWrite() and attachInterrupt().
8. Arduino Offers a Wide Range of Boards
The Arduino family covers many needs, so you can pick a board that matches your project’s size, power and connectivity.
- UNO R3 and UNO R4: The all-rounders. The R3 is 8-bit AVR; the R4 Minima is a 32-bit Arm Cortex-M4.
- Nano: Compact and breadboard-friendly for small builds.
- Mega 2560: 54 digital I/O pins and 16 analog inputs for pin-hungry projects.
- UNO R4 WiFi and Nano ESP32: Built-in Wi-Fi and Bluetooth for IoT projects.
- UNO Q: A dual-brain board that pairs a Linux-capable processor with a real-time STM32 microcontroller.
Because boards share the same IDE and similar APIs, moving between them is often easy, although libraries and pin voltages may need attention.
9. Arduino Builds a Strong Foundation for Embedded Systems and IoT
Arduino is a strong foundation because it exposes real embedded concepts through simple, hands-on APIs.
- You practice GPIO, ADC, PWM, interrupts, timers, UART, I2C and SPI on real hardware.
- These ideas carry over to ESP32, STM32, PIC and other ARM boards. Mostly the register names and APIs change.
- With a Wi-Fi board and a protocol such as MQTT or HTTP, you can build a full IoT flow: sensor, microcontroller, network, dashboard.
- You build professional habits early: reading datasheets, checking pin maps and testing hardware step by step.

9 Disadvantages of Arduino (and How to Work Around Them)
No tool is perfect. Knowing these limits early saves you from burnt pins, unstable sketches and surprise redesigns. Each point below ends with a practical workaround.
1. Arduino Has Limited Speed, Memory and Storage (Classic Boards)
Classic Arduino boards have limited speed, memory and storage because they use small 8-bit microcontrollers. The UNO R3 runs at 16 MHz with 32 KB of flash and only 2 KB of SRAM.
- Heavy jobs such as image processing, audio processing, large data buffers and complex machine learning do not fit.
- The 8-bit AVR has no hardware floating-point unit, so float math is emulated in software and runs slowly.
- Dynamic memory, especially the Arduino String class, can fragment 2 KB of SRAM and cause random crashes after hours of running.
- For perspective, a modern smartphone has millions of times more RAM than an UNO R3.
Workaround: Use fixed-size char arrays instead of String, keep constant text in flash with the F() macro (for example Serial.println(F(“Sensor ready”));), or step up to a board with more resources such as the UNO R4, ESP32 or STM32.
2. Arduino Has No Built-In Multitasking (Classic Boards)
Classic Arduino sketches have no built-in multitasking because everything runs inside a single loop().
- A delay() call freezes everything else. While the code waits, it cannot read a button or a sensor.
- True multitasking needs a real-time operating system (RTOS) such as FreeRTOS, which costs memory and adds complexity.
- Libraries can also compete for the same hardware timer. On the UNO, for example, the Servo library uses Timer1, which disables PWM on pins 9 and 10.
Workaround: Replace delay() with non-blocking millis() timing. This pattern lets one board blink an LED and watch a button at the same time:
const unsigned long interval = 1000;

unsigned long previousMillis = 0;

bool ledState = false;


void setup() {

  pinMode(LED_BUILTIN, OUTPUT);

  pinMode(2, INPUT_PULLUP);

}


void loop() {

  unsigned long now = millis();


  if (now - previousMillis >= interval) {  // time to toggle the LED?

    previousMillis = now;

    ledState = !ledState;

    digitalWrite(LED_BUILTIN, ledState);

  }


  if (digitalRead(2) == LOW) {             // checked on every pass, never blocked

    // handle the button press here

  }

}
For serious multitasking, move to an ESP32 or STM32, where FreeRTOS support is well established.
3. Arduino Has Limited Debugging Tools (Classic Boards)
Classic Arduino boards offer limited debugging because most debugging is done with Serial.print() instead of breakpoints.
- The UNO R3, Nano and Mega have no breakpoints, step-through execution or watch windows. Arduino IDE 2.x shows that debugging is not supported for the UNO R3.
- Arduino IDE 2.x includes a live debugger, but only for selected 32-bit boards, and usually with an external debug probe.
- Print statements slow your code and change its timing, so a bug can vanish when you add a print and return when you remove it.
Workaround: Use LEDs, a low-cost USB logic analyzer or an oscilloscope to observe signals. Write small, testable functions. When you need professional debugging, pick a board with an SWD debug port, such as the UNO R4 Minima, and use an external probe.
4. Arduino Is Not Built for Commercial Products
Arduino development boards are built for prototyping, not for mass-produced products.
- Boards carry parts a product does not need (USB-to-serial chip, headers, extra LEDs), which add cost, size and power draw.
- Real products need EMC testing, safety compliance, robust power design, secure updates and long-term supply planning. A development board solves none of these.
- Arduino convenience functions trade speed for simplicity. On AVR, digitalWrite() is often more than 10 times slower than direct port access:
// Arduino way: readable and portable, but slower

digitalWrite(13, HIGH);

// AVR register way (UNO R3: pin 13 is PB5): fast, but board-specific

DDRB  |= (1 << DDB5);     // set PB5 as output (do this once in setup)

PORTB |= (1 << PORTB5);   // drive PB5 high
Workaround: Prototype on Arduino, then move to a custom PCB with the bare microcontroller (or a more capable chip) and port timing-critical code to registers or the vendor HAL. Many real products follow exactly this path.
5. Arduino Hides Low-Level Concepts
Arduino hides low-level concepts because the framework abstracts away registers, clocks and memory maps.
- A beginner can finish a working project without ever opening a datasheet.
- Embedded jobs in industry expect register-level programming, RTOS basics, communication protocols and SWD/JTAG debugging.
- Habits that work in small sketches (global variables everywhere, blocking delays, no error handling) do not scale to larger firmware.
Workaround: After a few projects, challenge yourself. Blink an LED with direct register access, configure a timer interrupt by hand, and read the Timer/Counter chapter of the ATmega328P datasheet. These small exercises turn an Arduino user into an embedded engineer.
6. Arduino Pins Are Fragile and Voltage Levels Can Mismatch
Arduino I/O pins connect almost directly to the microcontroller, so a wiring mistake can permanently damage the chip.
- On the UNO R3, the recommended limit is about 20 mA per pin (40 mA absolute maximum). Driving a motor, buzzer or relay coil directly can damage the chip.
- The UNO R4 Minima datasheet lists only about 8 mA per pin, so wiring that worked on an R3 may overload an R4.
- The UNO R3 and R4 Minima use 5 V logic, while boards such as the Nano 33 BLE and Nano ESP32 use 3.3 V and are not 5 V tolerant. Feeding them 5 V signals can destroy a pin or the chip.
- The 3.3 V pin on the UNO R3 supplies only about 50 mA, which is not enough for many Wi-Fi modules.
Workaround: Drive loads through a transistor, MOSFET, relay module or driver IC with a separate supply (and a shared ground). Use level shifters between 5 V and 3.3 V devices, add series resistors for LEDs, and read the board’s datasheet before connecting any new module.
7. Arduino Boards Are Not Optimized for Low Power
Standard Arduino boards are not optimized for low power because the board itself consumes far more than the chip.
- The ATmega328P can drop to microamp levels in deep sleep, but a standard UNO also powers a voltage regulator, a USB-to-serial chip and an LED, so it draws tens of milliamps.
- A project that must run for months on a battery needs a low-power design: sleep modes, no always-on LEDs, an efficient regulator, or a bare chip on a custom board.
Workaround: Use the microcontroller’s sleep modes and wake it with interrupts only when needed. Choose a board designed for low power, and measure real current with a multimeter before you promise battery life.
8. Classic Arduino Boards Have Limited Connectivity and Security
Classic Arduino boards have no built-in Wi-Fi, Bluetooth or Ethernet, and they offer little hardware security.
- Wireless needs extra shields or modules, which add wiring, cost and more places for things to fail.
- Secure communication such as TLS is impractical on an 8-bit AVR with 2 KB of SRAM.
- Features like secure boot and over-the-air updates are not available out of the box on classic AVR boards.
Workaround: Choose a board with built-in wireless, such as the UNO R4 WiFi or Nano ESP32, or an ESP32 development board. Plan security (encrypted transport, credential storage, an update path) from day one.
9. Better-Value Alternatives Now Exist
Arduino is no longer the only low-cost option, and for some projects other boards simply give you more for the money.
- A Raspberry Pi Pico (RP2040) costs just a few dollars and has 264 KB of RAM, more than 100 times the RAM of an UNO R3.
- ESP32 boards add Wi-Fi and Bluetooth at a low price and can be programmed with the Arduino framework.
- Cheap clones can save money, but some use USB chips that need extra drivers, and build quality varies.
Honest counterpoint: Arduino’s documentation, tutorials and community support are still hard to beat. Many alternatives, including ESP32, RP2040 and STM32 boards, can also be programmed from the Arduino IDE, so your Arduino skills carry over.
Arduino is a microcontroller platform, while a Raspberry Pi is a single-board computer. ESP32 and STM32 are popular microcontroller families that overlap with Arduino in different ways.
| Feature | Arduino UNO R3 | Raspberry Pi | ESP32 | STM32 |
| What it is | 8-bit microcontroller board | Single-board computer | 32-bit microcontroller with Wi-Fi and Bluetooth | Family of 32-bit Arm Cortex-M microcontrollers |
| Typical clock speed | 16 MHz | About 1 to 2.4 GHz (model dependent) | Up to 240 MHz | Tens to hundreds of MHz (series dependent) |
| Operating system | None (bare metal) | Linux | FreeRTOS-based SDK | Bare metal or RTOS |
| Built-in wireless | No | Yes on most models | Yes (model dependent) | Depends on the part |
| Real-time control | Good for simple tasks | Not real-time by default | Good | Excellent |
| Learning curve | Easy | Moderate | Easy to moderate | Steeper |
| Best for | Learning, prototypes, simple control | Vision, servers, full applications | Low-cost Wi-Fi and Bluetooth IoT | Professional, production-grade products |
When to Use Arduino (and When to Move On)
Use Arduino when:
- You are learning embedded fundamentals such as GPIO, ADC, PWM, I2C, SPI and UART.
- You need a quick proof of concept, demo or college project.
- The job is simple, real-time I/O: reading sensors, switching relays, driving motors.
- You are building hobby projects such as home automation, weather stations, data loggers or line-following robots.
Consider something else when:
- You need low-cost Wi-Fi or Bluetooth with real multitasking: choose an ESP32.
- You need a camera, a GUI, heavy computing or a full operating system: choose a Raspberry Pi.
- You are designing a product that will ship: choose an STM32 (or a similar Arm Cortex-M family) on a custom PCB.
Many real projects combine two of these, for example a Raspberry Pi for heavy processing and an Arduino for real-time hardware control.
How to Go Beyond Arduino: A Simple Learning Path
Here is a clean path from your first sketch to professional embedded work:
- Master the basics on an UNO: digital I/O, analog input, PWM and serial communication.
- Learn protocols with real parts: I2C sensors, SPI displays and UART modules.
- Replace blocking code with millis() timing, state machines and interrupts.
- Try register-level C on the ATmega328P to see what the Arduino functions hide.
- Move to a 32-bit board such as an STM32 or ESP32 and add an RTOS.
- Build one complete IoT project: sensor, microcontroller, MQTT or HTTP, and a dashboard.

Conclusion: Is Arduino Worth Using?
Arduino is a fantastic first gear. The mistake is thinking it is the whole gearbox. Use it to learn fundamentals and prove ideas quickly, then move to the right tool when your project demands more speed, memory, connectivity or production quality.
Key takeaways:
- Arduino is an open-source platform of microcontroller boards and free software, ideal for learning and prototyping.
- Its biggest advantages are easy learning, low cost, an open ecosystem, fast prototyping and a strong community.
- Its biggest disadvantages on classic boards are limited resources, no multitasking, limited debugging and weak fit for commercial products.
- Newer boards such as the UNO R4 and UNO Q ease several of these limits, but the engineering trade-offs still apply.
- Keep learning below the abstraction: registers, timers, interrupts, protocols and RTOS.
Ready to go beyond Arduino? Build job-ready skills in ARM Cortex-M programming, RTOS, communication protocols and IoT with hands-on embedded systems training at the Indian Institute of Embedded Systems (IIES), Bangalore.