Overview
Because of their great versatility, STM32 microcontrollers come with a wide range of peripherals that make it easier to communicate with a variety of external devices. Actuators can include motors, LEDs, and relays, while sensors can be as basic as analog sensors (like temperature sensors) or as sophisticated as digital devices (like gyroscopes and pressure sensors). The main topic of this paper is how to use common communication protocols like I2C, SPI, and analog interfaces to connect STM32 to external sensors and actuators.
Connecting Sensors
Connect the sensor to STM32 I2C, SPI, and UART are just a few of the many communication interfaces that STM32 microcontrollers have. Sensors and microcontrollers are frequently connected via these interfaces.
Making Use of the I2C Protocol  
A popular serial communication protocol for attaching low-speed peripherals, such as sensors, to microcontrollers is called I2C (Inter-Integrated Circuit).
It supports several devices on a single bus and uses two wires:
SDA (data) and SCL (clock)
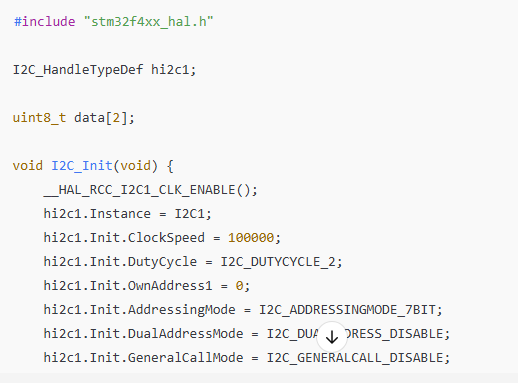
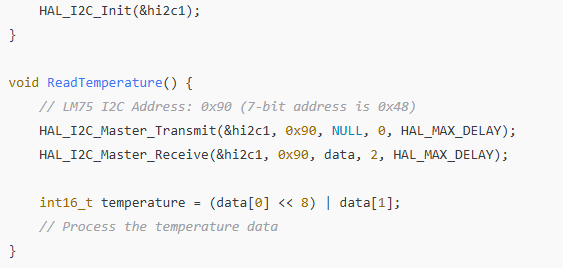
For instance, connecting an I2C temperature sensor (like the LM75) Connecting: Attach the STM32’s SDA (data line) and SCL (clock line) to the appropriate pins on the LM75 sensor. Make sure the ground and power pins on the sensor are connected correctly.
Configuring the STM32: Turn on the I2C peripheral and assign the appropriate pins to the STM32CubeMX. Select Master as the I2C communication mode.
Example of Code:
Making Use of SPI Protocol
Another popular protocol that facilitates high-speed data transfer is SPI (Serial Peripheral Interface). It is frequently utilized for sensors like accelerometers and gyroscopes that need to communicate quickly.
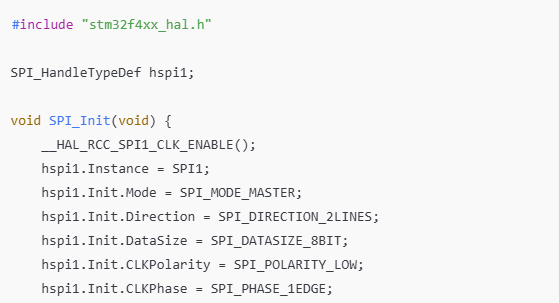
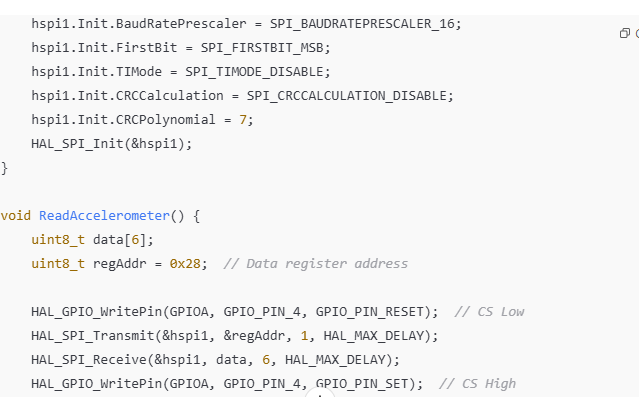
For instance, connecting to an SPI accelerometer (like the LIS3DH) Connecting: Attach the STM32 to the LIS3DH accelerometer via the MISO (Master In Slave Out), MOSI (Master Out Slave In), SCK (Serial Clock), and CS (Chip Select) lines.
Configuring the STM32: Assign the appropriate pins and configure the SPI peripheral in STM32CubeMX
Example of Code:
Analog-to-Digital Converter
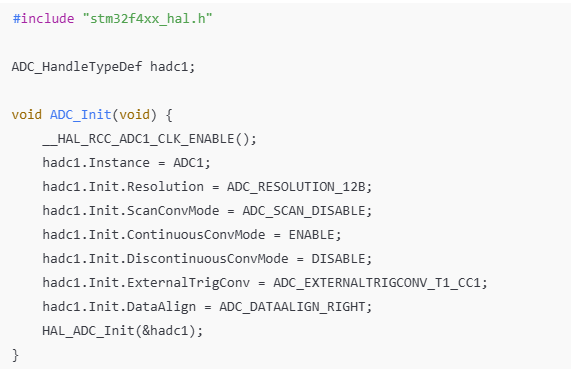
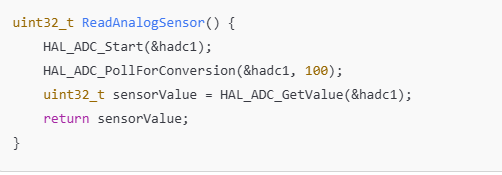
(ADC) channels are another feature of STM32 microcontrollers that can be used to interface with sensors that produce analog signals, like light sensors (like the LDR) or temperature sensors (like the LM35).
For instance, connecting to an analog temperature sensor (such as the LM35)
Connecting: Attach the analog sensor’s output to one of the ADC input pins (PA0, for example).
Configuring the STM32: Turn on ADC and designate the proper channel in STM32CubeMX.
Example of Code:
Connecting Actuators to STM32
Once sensor data has been successfully collected, the STM32 must be interfaced with actuators, like motors or relays, to carry out actions in response to the sensor inputs.
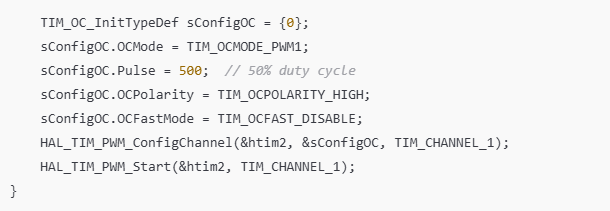
Driving Motors with PWM PWM (Pulse Width Modulation) is frequently used to regulate LED brightness or motor speed.
Example:
Using PWM to Control a DC Motor Connecting: Use PWM control lines that are connected to an STM32 to connect a DC motor to a motor driver (such as the L298N). Configuring the STM32: Set up a timer in the STM32CubeMX to produce PWM signals on the selected pin.
Example of Code:

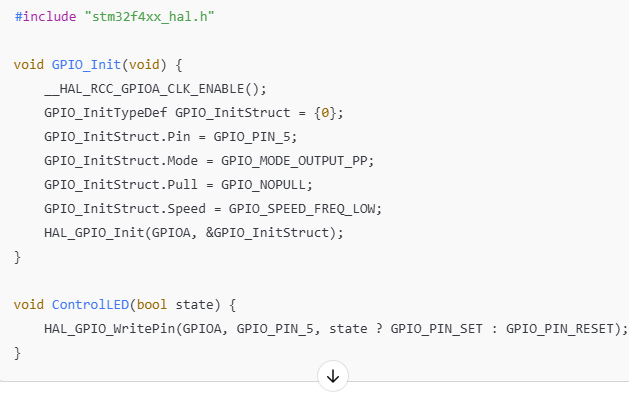
Utilizing GPIO Pins for Management
Relays and LEDs are examples of digital actuators that can be controlled by the STM32’s GPIO pins.
For instance, managing an LED Connecting: Attach an LED using a current-limiting resistor to a GPIO pin (such as PA5)
Configuring the STM32: Set up the GPIO pin as an output in the STM32CubeMX.
Example of Code:
Protection and Power Considerations
Power needs and security must be taken into consideration when integrating with external devices: Make sure the STM32 and sensors/actuators have compatible voltage levels (e.g., 3.3V logic for STM32 vs. 5V for certain sensors).
Level Shifters: To interface with devices that need varying voltage levels, use level shifters.
Current Protection: To guard against harm to the microcontroller or its peripherals, use the proper current-limiting resistors, fuses, or diodes. Decoupling
Capacitors: To stabilize the voltage and lower noise, place capacitors near the power pins of sensors and actuators.
In conclusion
A versatile platform for integrating with a variety of sensors and actuators is offered by STM32 microcontrollers. You can connect to a variety of sensors and gather data for your applications by utilizing communication protocols like I2C, SPI, and ADC. Motors, LEDs, and other actuators can also be controlled by PWM and GPIO pins. Power and protection should always be taken into account to guarantee your system operates safely and dependably.