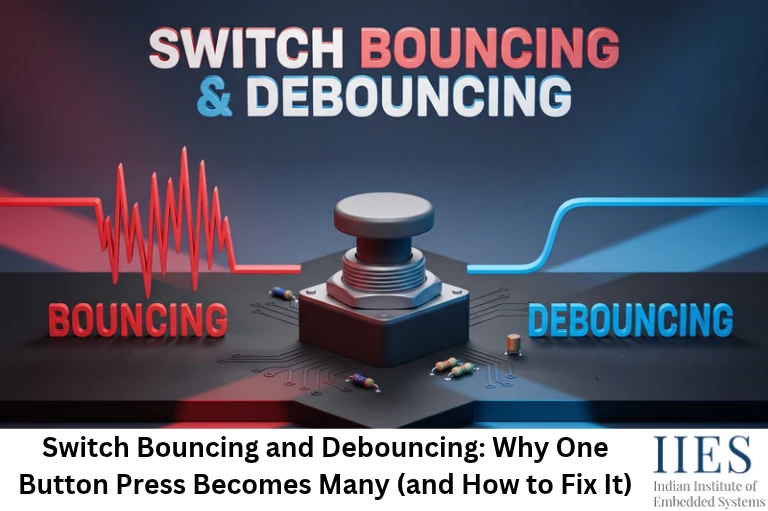
What Is Switch Bounce?
Switch bounce (also called contact bounce or contact chatter) is the rapid, unintended making and breaking of electrical contact when a mechanical switch opens or closes.
Think of dropping a basketball on the floor. It does not stop dead on the first touch. It rebounds, lands again, rebounds a little lower, and finally comes to rest. Switch contacts do the same thing, only thousands of times faster, and your microcontroller watches every single rebound.
Why Do Switch Contacts Bounce?
- Metal contacts are springy, so they rebound when they slam together.
- Contact surfaces are microscopically rough, so the connection forms and breaks across tiny points.
- The contact arm and the actuator spring vibrate like a tiny mechanical oscillator until the energy dies out.
- Finger speed and force change on every press, so no two bounce patterns look identical.
- Bounce happens when the switch closes and also when it opens.

What Does Switch Bounce Look Like?
Here is an active-low push button with a pull-up resistor (idle = HIGH, pressed = LOW). Instead of one clean falling edge, the pin flickers before it settles:
HIGH  ---------+     +---+   +-+
               |     |   |   | |
LOW            +-----+   +---+ +-------------------
               ^               ^
         first contact      settled
               |<--- bounce -->|
A single press can create anywhere from a couple of edges to dozens of them.
The burst usually lasts from under 1 ms to roughly 20 ms. Large, worn, or cheap switches can take longer.
The release bounces too, so the same problem appears when you let go.
Bench tip: Probe the button pin with a logic analyzer or oscilloscope and the bounce becomes visible in seconds. Capture a few hundred presses and note the longest burst.
Why Your Microcontroller Cannot Ignore It
A 16 MHz microcontroller runs about 16,000 clock cycles every millisecond.
A 5 ms bounce burst is therefore roughly 80,000 cycles of flickering input.
A fast polling loop or a GPIO interrupt sees every single flicker. Your code is not wrong. The MCU is simply much faster than the switch.
Which Switches Bounce?
- They bounce: Tactile push buttons, toggle and rocker switches, slide switches, keypad contacts, reed switches, limit switches, and relay contacts.
- They do not bounce mechanically: Optical, Hall-effect, and capacitive touch switches. They can still pick up noise, so a short digital filter helps there too.
The Effects of Switch Bounce
The effects of switch bounce range from annoying glitches to real reliability problems, because a microcontroller reacts to every edge it sees. Here is what goes wrong:
- Multiple false triggers: One press is counted as 2, 3, or more. Counters, menus, and volume controls overshoot.
- Random toggling: A toggle LED flips once per detected edge. An odd number of edges flips it, but an even number cancels out, so the press seems to be ignored.
- ISR flooding: Every bounce edge fires the external interrupt again, which wastes CPU time and delays other tasks.
- Broken state machines: One press can push a state machine through several states, such as START, STOP, START, within microseconds.
- Duplicate characters: A keypad types “hheelllo” when key contacts chatter during a scan.
- Wasted battery power: In a battery-powered IoT node, every bounce edge can wake the MCU from sleep, and the extra wake-ups drain the cell.
- Wrong control decisions: A bouncing limit switch or door sensor sends a burst of open and close events, which can confuse motor or safety logic.
- Electrical noise: Each bounce is a sharp edge that can couple into neighboring signals.
Prove It Yourself With a Simple Arduino Sketch
Run this experiment and you will see the effects of switch bounce on your own bench. Wire a push button between pin 2 and GND on an Arduino Uno, upload the sketch, and open the Serial Monitor:
volatile uint8_t edgeCount = 0;

void onEdge() {
  edgeCount++;                      // count every falling edge the MCU sees
}

void setup() {
  Serial.begin(115200);
  pinMode(2, INPUT_PULLUP);         // button between pin 2 and GND
  attachInterrupt(digitalPinToInterrupt(2), onEdge, FALLING);
}

void loop() {
  static uint8_t reported = 0;
  if (edgeCount != reported) {      // print whenever the count changes
    reported = edgeCount;
    Serial.println(reported);
  }
}
Press once and watch how far the number jumps. A clean press moves it by 1. A bouncy one jumps by 2, 3, or more.
The result changes from switch to switch and even from press to press.
Every extra count is a bounce edge that your code would have treated as a real press.
Switch Debouncing: The Core Idea
Switch debouncing is the process of filtering out contact bounce so that one physical press produces exactly one logical event. Every debounce method follows one rule: do not trust the first edge. Trust the signal only after it has stayed stable for longer than the bounce.
There are two families of solutions:
| Factor | Hardware Debouncing | Software Debouncing |
|---|
| Extra parts | Resistor, capacitor, gate, or IC | None |
| CPU load | Zero | Small (a timer tick or a few instructions) |
| Cost as button count grows | Rises with every button | Almost free |
| Flexibility | Fixed on the PCB | Timing changes in firmware |
| Best for | A few critical or interrupt-driven lines | Most products and prototypes |
Hardware Debouncing Techniques
1. RC Filter With a Schmitt Trigger
An RC debounce circuit uses a capacitor to smooth out the flicker and a Schmitt trigger to turn the smoothed voltage into a clean digital edge.
- A pull-up resistor (R1) holds the input HIGH. The switch pulls it LOW.
- A capacitor from the input node to ground cannot change voltage instantly, so short bounce pulses get absorbed.
- A Schmitt trigger (a 74HC14 gate, or the Schmitt-trigger input found on many MCUs) uses two thresholds, called hysteresis, to turn the slow ramp into a crisp edge.
- The time constant is τ = R × C. For example, 10 kΩ × 1 µF = 10 ms, which is a sensible starting point for ordinary tactile switches. Fine-tune it on the bench.
- Add a small series resistor (100 Ω to 1 kΩ) between the switch and the capacitor, so the capacitor does not dump a large surge current through the contacts.
          Vcc
           |
          [R1] 10k pull-up
           |
           +-----------+-----------> to Schmitt trigger / MCU pin
           |           |
          [R2] 330R   [C] 1uF
           |           |
        [SWITCH]       |
           |           |
          GND         GND
Pros: Cheap, needs no code, and works well on interrupt lines.
Cons: Adds delay to both edges, needs a Schmitt trigger input, and component tolerance shifts the timing.
2. SR Latch (NAND Latch) for SPDT Switches
An SR latch debouncer uses a single-pole double-throw (SPDT) switch and two cross-coupled NAND gates (a 74HC00, for example) to give a perfectly clean output with no added delay.
- The first touch of the new contact flips the latch.
- While that contact rattles, the latch simply holds its state, because the opposite contact is already open.
- It needs an SPDT switch plus a gate IC, so it suits a few critical signals, such as a manual clock button in a digital logic circuit.
3. Dedicated Debouncer ICs
Chips such as the MAX6816, MAX6817, and MAX6818 (single, dual, and octal switch debouncers) and the MC14490 (hex contact bounce eliminator) handle the job in a single package.
They suit rugged panels with many inputs where you want zero firmware overhead.
Pro tip: Read your microcontroller’s datasheet before adding parts. Some devices include an input filter or debounce option inside the external interrupt block, and that costs nothing.
Software Debouncing Techniques (With C Code)
Software debouncing filters bounce in firmware, so it needs no extra components and the timing can be changed with one line of code.
The examples below assume an active-low button with a pull-up resistor. The functions gpio_read(), millis(), delay_ms(), and the BTN_PIN constant are placeholders for your platform’s equivalents, so the logic ports to Arduino, STM32 HAL, ESP-IDF, AVR, PIC, or 8051 toolchains.
Method 1: Delay-Based Debounce (Simple but Blocking)
- Detect the first edge.
- Wait about 20 ms for the bounce to end.
- Read the pin again. If the level is unchanged, it was a real press.
bool button_pressed(void)
{
    if (gpio_read(BTN_PIN) == LOW) {        // possible press
        delay_ms(20);                       // wait out the bounce
        if (gpio_read(BTN_PIN) == LOW) {    // still LOW? it is real
            return true;
        }
    }
    return false;
}
Good for: Quick demos and first experiments.
Avoid in: Anything time-critical, because the CPU does nothing for 20 ms. Never use a delay inside an ISR. In an RTOS task, use the RTOS delay call instead.
Limitation: As written, it keeps returning true while the button is held, so track the release as well.

Method 2: Timestamp Debounce (Non-Blocking)
- Remember when the raw input last changed.
- Accept the new state only after it has stayed stable for
DEBOUNCE_MS. - The rest of your program keeps running.
#define DEBOUNCE_MS 20

bool read_debounced(void)
{
    static bool     stable_state = false;   // debounced result (true = pressed)
    static bool     last_raw     = false;   // previous raw reading
    static uint32_t last_change  = 0;       // time of the last raw change

    bool raw = (gpio_read(BTN_PIN) == LOW);

    if (raw != last_raw) {                  // input moved, restart the timer
        last_raw    = raw;
        last_change = millis();
    }

    if ((millis() - last_change) >= DEBOUNCE_MS) {
        stable_state = raw;                 // stable long enough, accept it
    }
    return stable_state;
}
Pro tip: The unsigned subtraction millis() - last_change stays correct even when the 32-bit millisecond counter rolls over (about every 49.7 days).
Method 3: Timer-Tick Counter (The Dependable Workhorse)
- A periodic timer or RTOS tick calls the debounce function every 1 to 5 ms.
- A change is accepted only after N consecutive samples disagree with the current stable state.
- It is deterministic, non-blocking, and scales to many buttons: keep one
debounce_t per button in an array.
#define STABLE_SAMPLES  4               // 4 samples x 5 ms tick = 20 ms

volatile bool button_event = false;     // set here, cleared in the main loop

typedef struct {
    uint8_t counter;
    bool    stable;                     // debounced state (true = pressed)
} debounce_t;

static bool debounce_update(debounce_t *d, bool raw)
{
    if (raw == d->stable) {
        d->counter = 0;                 // nothing pending
    } else if (++d->counter >= STABLE_SAMPLES) {
        d->stable  = raw;               // change held long enough
        d->counter = 0;
    }
    return d->stable;
}

// Called every 5 ms from a timer interrupt or scheduler tick
void on_tick(void)
{
    static debounce_t btn;
    static bool       was_pressed;

    bool pressed = debounce_update(&btn, gpio_read(BTN_PIN) == LOW);

    if (pressed && !was_pressed) {
        button_event = true;            // exactly one event per press
    }
    was_pressed = pressed;
}
Keep the tick handler short: set a flag and do the real work in the main loop.
Shift-register variant: Push each sample into an 8-bit history with history = (history << 1) | pressed;, then treat 0xFF as stable pressed and 0x00 as stable released.
Method 4: Interrupt Plus One-Shot Timer (Best for Low-Power IoT)
Polling every few milliseconds keeps the MCU awake. This method lets it sleep until the first edge arrives:
- The first edge fires the GPIO interrupt and wakes the MCU.
- The ISR masks that interrupt and starts a one-shot timer (about 20 ms).
- When the timer expires, read the pin. If it is still LOW, the press is real.
- Clear any pending edge flag, then re-enable the GPIO interrupt.
#define DEBOUNCE_MS 20

void button_isr(void)                    // fires on the first falling edge
{
    gpio_irq_disable(BTN_PIN);           // ignore the bounce that follows
    timer_start_oneshot(DEBOUNCE_MS);    // verify after the bounce window
}

void debounce_timer_isr(void)            // fires once, about 20 ms later
{
    if (gpio_read(BTN_PIN) == LOW) {
        button_event = true;             // confirmed press, flag for main loop
    }
    gpio_irq_clear_pending(BTN_PIN);     // drop edges latched during the bounce
    gpio_irq_enable(BTN_PIN);
}
Do not skip the clear-pending step. Many MCUs latch the edge flag even while the interrupt is masked, so re-enabling without clearing can fire a false ISR immediately.
This version catches the press. To catch the release, re-arm for the rising edge and repeat the same logic.
Which Debouncing Method Should You Choose?
| Your Situation | Best-Fit Method |
|---|
| Quick Arduino prototype | Timestamp (millis) debounce |
| Bare-metal product with several buttons | Timer-tick counter |
| Battery-powered IoT node that sleeps most of the time | Interrupt plus one-shot timer |
| One critical, interrupt-driven signal | RC filter plus Schmitt trigger |
| Clean signal from an SPDT switch in a logic circuit | SR latch |
| Long press, double click, or an RTOS-based UI | State machine in a task (IDLE, DEBOUNCE, PRESSED, RELEASE), fed by one of the methods above |
How to Choose the Right Debounce Time
The right debounce time is longer than your switch’s worst-case bounce and shorter than your fastest real press.
- Measure first. Use a scope or logic analyzer, press the switch a few hundred times, and note the longest burst. Switch datasheets often list a bounce or chatter time as well.
- Start at 20 ms. Most tactile switches settle well below that.
- Go longer for large, old, or cheap switches. 30 to 50 ms is common for them.
- Do not overdo it. Too long, and the button feels sluggish and quick taps get lost. Even fast tapping leaves roughly 100 ms between presses, so 20 to 50 ms will not swallow real ones.
- Debounce both edges. Release bounce can create phantom presses.
Quick check: Your delay-based debounce waits 20 ms, but the switch keeps bouncing for 25 ms. What happens? The pin is read while it is still flickering, so you may read the wrong level and see a false or missed press. Measure the worst case and set the window safely above it.
Common Debouncing Mistakes to Avoid
- Putting a delay inside an ISR. Keep ISRs tiny: set a flag or start a timer.
- Debouncing only the press. The release bounces as well.
- Assuming a pull-up fixes bounce. Pull-up and pull-down resistors cure floating inputs. They do nothing about bounce.
- Using an RC filter without a Schmitt trigger. A slow ramp lingers near the input threshold and can cause multiple edges or extra supply current.
- Forgetting volatile. Any variable shared between an ISR and the main loop must be declared
volatile. - Copying 50 ms everywhere. Bounce depends on the switch, so measure each type you use.
- Leaving the input floating. Enable an internal or external pull-up so the idle level is always defined.
Debouncing Beyond Push Buttons
- Keypad matrix: Scan every 5 to 10 ms and accept a key only after it appears in 2 to 4 consecutive scans.
- Rotary encoders: Combine a small RC filter with a state-table decoder that rejects impossible transitions.
- Reed switches, limit switches, and door sensors: Same mechanical contacts, same bounce, same fixes.
- Optical, Hall-effect, and capacitive touch inputs: No contact bounce, but a short digital filter still rejects noise.
Key Takeaways
- Mechanical switches never give one clean edge. They bounce for roughly 1 to 20 ms on both press and release.
- The effects of switch bounce include false triggers, flooded ISRs, broken state machines, and wasted battery power.
- Hardware debouncing uses an RC filter with a Schmitt trigger, an SR latch, or a dedicated IC.
- Software debouncing uses a delay, a timestamp, a timer-tick counter, or an interrupt with a one-shot timer.
- Start with 20 ms, measure your own switches, and debounce both edges.

Conclusion
Once you understand switch bouncing and debouncing, those phantom double presses finally make sense. The switch is not broken and your code is not wrong. A mechanical contact simply needs a few milliseconds to settle, and your firmware needs to wait for it.
Here is your next step: run the Arduino edge counter, watch the numbers jump, then apply Method 3 and see the count settle at exactly 1 per press. From now on, treat every mechanical input as noisy until it has proven otherwise.