1.Overview
One of the main functions of the Internet of Things (IoT) is gathering data from sensors and sending it to the cloud for analysis, display, and action. There are two well-liked approaches for Arduino-based projects: ThingSpeak: A user-friendly cloud platform with features for visualization.
MQTT: A real-time, lightweight messaging
system that allows for scalable, adaptable
communication. Both approaches are thoroughly examined in this guide, which includes principles, thorough wiring, code optimization, security advice, and performance adjustments.
2.Hardware and Software Requirements:
Hardware: Arduino (ESP8266, ESP32, Mega, Nano, Uno)
Wi-Fi Module (ESP-01 with Arduino Uno or
ESP8266 NodeMCU suggested)
Sensors: any analog sensor (LM35, MQ-2,
LDR) or DHT11/DHT22 Using a breadboard and jumpers Logic level converter (optional) if connecting a 3.3V ESP to a 5V Arduino
The Arduino IDE software Libraries: ESP8266WiFi.h
ThingSpeak.h
PubSubClient.h Libraries tailored to particular sensors
(e.g., DHT.h)
3.Using an ESP8266 to connect an Arduino to the Internet
Using the ESP8266/NodeMCU directly:
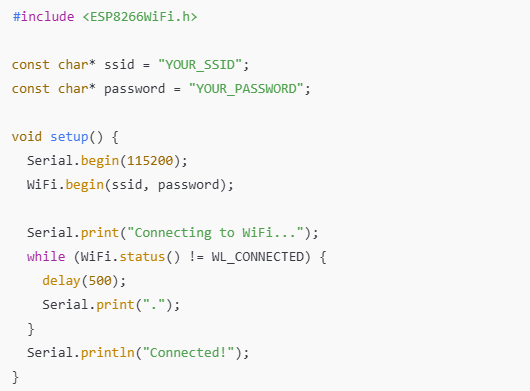
Important:
WiFi.status () should always be checked before
transferring any data. Add auto-reconnect code
for stability.
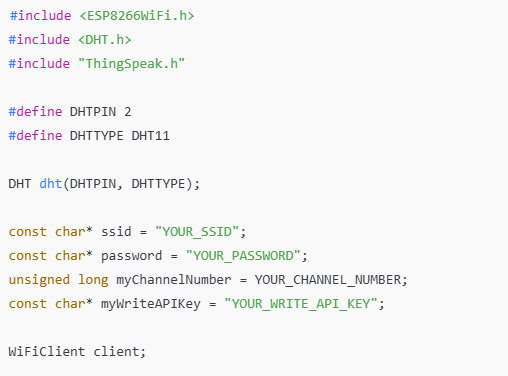
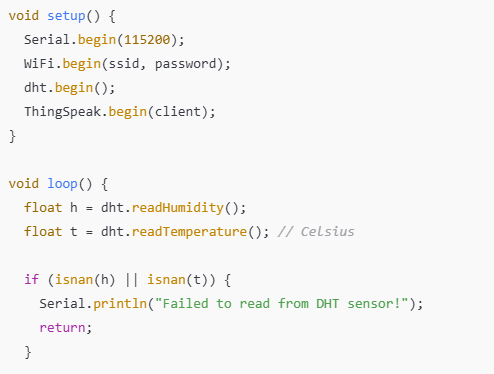
4.Method 1: Data Transmission to ThingSpeak
Sensor data can be uploaded to ThingSpeak using HTTP POST or GET requests.
a) Configuring ThingSpeak Create a ThingSpeak account. Make a brand-new channel. Turn on fields, such as Field1 = Temperature. Make a copy of the Write API Key.
b) Full Arduino Sketch (ThingSpeak + DHT11)
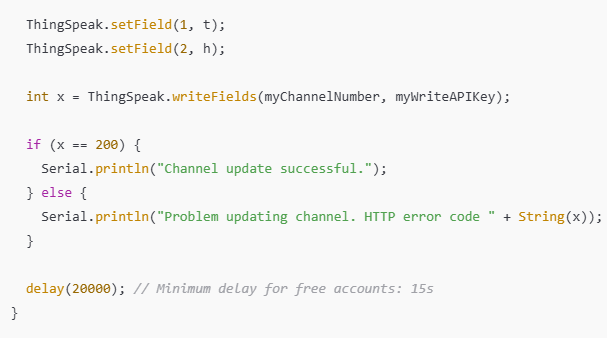
c) Production Notes:
Retry unsuccessful queries to prevent data loss. Synchronization of time (NTP) if you timestamp
information. Sending in batches lowers connection overhead.
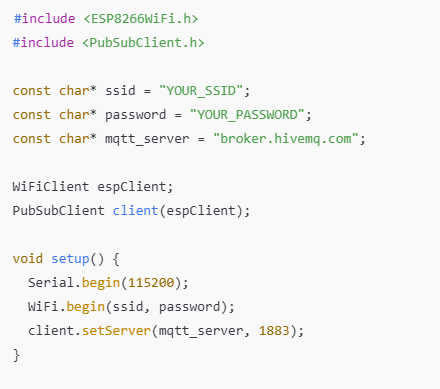
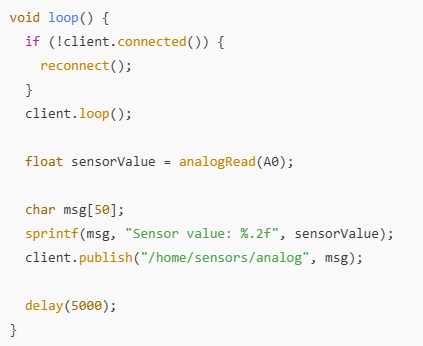
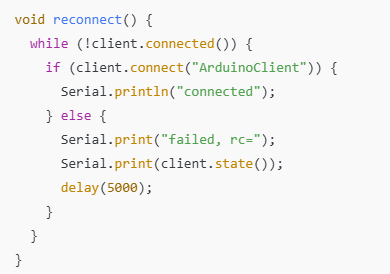
5.Method 2: Message Queuing Telemetry Transport (MQTT)
Data Transmission MQTT is a publish/subscribe mechanism.
Data is published to a topic by Arduino. Subscribers receive the data from a server
(broker).
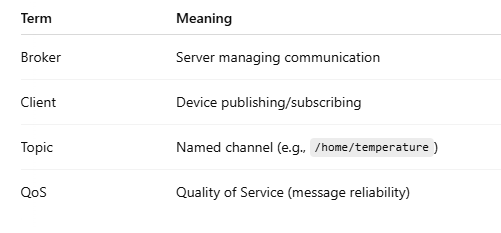
a)Fundamental MQTT Ideas
b)Basic Flow of Arduino + MQTT
6.Data Visualization

7.Security Points to Remember
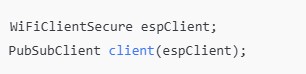
Make use of WPA2-secured Wi-Fi. Choose MQTT (mqtts on port 8883) over TLS. Verify clients using their login and password. Reduce the vulnerability of API keys (for ThingSpeak).
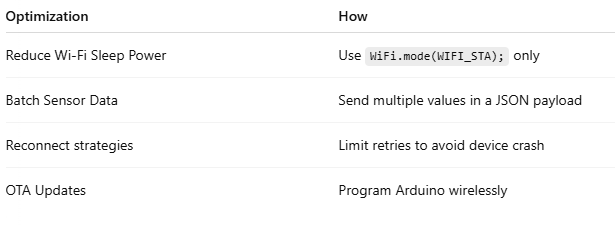
8.Sophisticated Adjustments
9.Concluding Advice
Prior to shipping, always verify sensor readings. Keep an eye out for connection failures, particularly with MQTT. Reduce the data rate when using mobile networks. For unsupervised IoT devices, use watchdog timers. Before switching to cloud services, test on a local broker.
10.Concluding remarks
Depending on the objectives of your IoT project, ThingSpeak and MQTT are both great options. When you want simple storage and fast graphs, use ThingSpeak. When you require scalable, real-time communication, use MQTT. Gaining proficiency in both will boost your Arduino IoT abilities
I may add the following extras for you:
- MQTT-based Node-RED Dashboard GuideCircuit schematics for complete configurations
- PDF export is available for
- For instance, simultaneous ThingSpeak and MQTT upload
