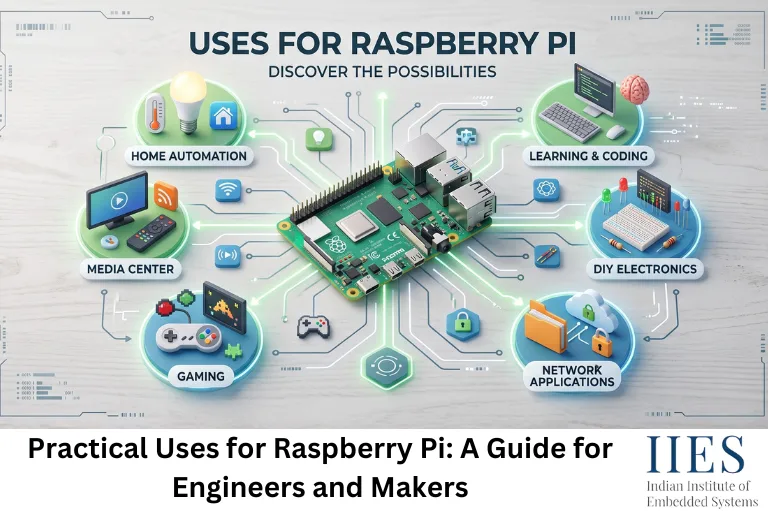
What Is a Raspberry Pi, Exactly?
A Raspberry Pi is a full single-board computer (SBC), not a microcontroller, about the size of a credit card. It runs a complete operating system, usually Raspberry Pi OS (a Debian-based Linux distribution, currently built on Debian 13), and includes a real CPU, RAM, USB ports, HDMI output, and a 40-pin GPIO (General Purpose Input/Output) header for wiring up sensors, motors, and other hardware.
That GPIO header is what separates it from a regular desktop PC and puts it firmly in embedded systems territory. You get the software flexibility of Linux, Python, C, Node.js, whatever you’re comfortable with, combined with the ability to talk directly to physical hardware over I2C, SPI, and UART. That combination is exactly why the Pi shows up so often in IoT and embedded projects instead of staying a hobbyist toy.
Practical Uses for Raspberry Pi in Real Projects
These are the categories that actually hold up once you’ve built a few of them, not just what looks good in a launch video.
1. Embedded Systems Prototyping and Learning
- Test embedded and IoT product ideas before designing a custom PCB.
- Connect sensors, actuators, and displays directly to the Raspberry Pi GPIO pins.
- Build a working proof of concept quickly using Python or C/C++.
- Use built-in communication interfaces such as:
- Connect peripherals such as:
- Temperature sensors
- Accelerometers
- OLED displays
- RFID readers
- After validating the hardware and software logic, move to a dedicated microcontroller for production.
- Production designs may use microcontrollers such as STM32 or other suitable MCUs.
- The Raspberry Pi mainly helps reduce uncertainty and development time during the early prototyping stage.
2. Home Automation and Smart Hubs
- Use Raspberry Pi as a central controller for a smart home.
- Run platforms such as Home Assistant.
- Connect and manage devices including:
- Smart lights
- Sensors
- Thermostats
- Cameras
- Integrate devices from different brands into one interface.
- Connect Zigbee devices using a compatible USB radio dongle.
- Connect Z-Wave devices using appropriate hardware.
- Use built-in Wi-Fi and Bluetooth for supported devices.
- Use MQTT to exchange data with custom IoT devices.
- Integrate ESP32-based sensor nodes into the same automation system.
- Keep automation rules and data under local control instead of depending completely on cloud services.
3. Network Utilities: Ad-Blocking, VPN, and File Storage
- Run low-power network services continuously.
- Use Pi-hole for network-wide ad and tracker blocking.
- Use WireGuard for secure remote access to your network.
- Set up basic local file storage using:
- Filter unwanted domains at the DNS level for multiple devices on the network.
- Access your home network securely when outside.
- Reduce power consumption compared with running a desktop PC 24/7.
- Use Raspberry Pi 4 or Pi 5 for better storage performance.
- Keep in mind that a Raspberry Pi NAS may not match a dedicated NAS under heavy simultaneous read/write workloads.
4. Media Server and Home Entertainment
- Turn a TV into a DIY media player.
- Run media center software such as Kodi.
- Use Raspberry Pi as a client for media platforms such as Jellyfin or Plex.
- Connect the board to a TV through HDMI.
- Play locally stored or network-streamed media.
- Use a separate server for larger media libraries.
- Run a small media server directly on the Pi when performance requirements are moderate.
- Raspberry Pi 4 and Pi 5 provide significantly better performance for modern media workloads than older models.
5. Robotics and Automation Projects
- Use Raspberry Pi for robots requiring more processing power than a typical microcontroller.
- Handle higher-level tasks such as:
- Image processing
- Computer vision
- Path planning
- Sensor data processing
- Coordinating multiple devices
- Connect motor drivers for controlling motors and actuators.
- Pair the Pi with a microcontroller for precise time-sensitive control.
- Let the Raspberry Pi handle high-level decisions.
- Let the microcontroller handle hard real-time tasks.
- This approach is useful because standard Linux is not designed for deterministic hard real-time timing.
- Run ROS or ROS 2 for robotics applications.
- Use Raspberry Pi 5 for more demanding robotics and ROS 2 workloads.
- Apply this architecture to projects such as:
- Autonomous rovers
- Line-following robots
- Camera-based robots
- Sensor-driven automation systems
6. Retro Gaming Emulation
- Build a DIY retro gaming console using a Raspberry Pi.
- Run emulation platforms such as:
- Install a compatible operating system image on an SD card.
- Connect a USB or Bluetooth game controller.
- Connect the Raspberry Pi to a TV or monitor through HDMI.
- Emulate classic gaming systems and arcade platforms.
- Raspberry Pi 3 and Zero 2 W can handle many older systems.
- Raspberry Pi 4 and Pi 5 offer better performance for more demanding emulation workloads.
- This is one of the easiest Raspberry Pi projects for beginners.
7. Edge AI and Computer Vision
- Run AI workloads locally instead of sending all data to the cloud.
- Pair Raspberry Pi 5 with compatible AI acceleration hardware such as the AI HAT+.
- Perform tasks including:
- Object detection
- Image classification
- Pose estimation
- Reduce latency by processing data close to where it is generated.
- Improve privacy by keeping sensitive camera data local.
- Continue operating when cloud connectivity is unreliable.
- Use edge AI for applications such as:
- Smart security cameras
- Factory monitoring
- Automated inspection
- Local vision systems
- The AI HAT+ uses a Hailo AI accelerator.
- Available accelerator options include 13 TOPS and 26 TOPS variants.
- Newer AI hardware can also support compact generative AI workloads, depending on the specific hardware and software stack.
8. Industrial Monitoring and Production Deployment
- Use Raspberry Pi hardware in commercial and industrial embedded products.
- Common applications include:
- Digital signage
- Point-of-sale terminals
- Process automation
- Environmental monitoring
- Thin clients
- Industrial controllers
- Use the Raspberry Pi Compute Module family when designing custom commercial hardware.
- Mount a Compute Module on a custom carrier board for product-specific connectivity and form factors.
- Use a standard Raspberry Pi 4 for moderate monitoring and control workloads.
- Use a Raspberry Pi Zero 2 W for smaller and lower-power applications where suitable.
- Connect digital sensors through I2C, SPI, or other interfaces.
- Use an external ADC when analog sensor measurements are required.
- Remember that standard Raspberry Pi boards do not provide built-in analog input pins.
- Example monitoring applications include:
- Greenhouse temperature and humidity monitoring
- Weather stations
- Equipment vibration monitoring
- Laboratory data logging
9. Security Cameras and Surveillance
- Connect an official Raspberry Pi Camera Module or compatible USB webcam.
- Build a self-hosted surveillance system.
- Use motion-detection software compatible with the Raspberry Pi.
- Record video locally instead of relying entirely on subscription-based cloud services.
- Configure motion-triggered recording.
- Define custom motion detection zones where supported by the software.
- Integrate cameras with a home automation platform.
- Maintain control over your own video storage and data.
- Consider storage capacity, system reliability, updates, and maintenance when building a self-hosted system.
Which Raspberry Pi Model Fits Which Use Case?
Model | Best For | Why |
Raspberry Pi Zero 2 W | Small, battery-friendly sensor nodes and simple IoT devices | Compact and low power, with Wi-Fi built in, but Micro-USB only, so plan on an OTG adapter for peripherals |
Raspberry Pi 4 | General learning, home servers, budget builds | Mature, extensively documented, runs cooler than the Pi 5, and still solid for Pi-hole, basic automation, and standard IoT hubs |
Raspberry Pi 5 | Robotics, AI/vision, NVMe-backed storage, anything CPU-heavy | Roughly 2-3x the Pi 4’s performance, PCIe support for NVMe SSDs and AI accelerators, dual 4K HDMI output |
Raspberry Pi 500 | Beginner-friendly, all-in-one desktop setup | Pi 5 hardware built into a keyboard, plug in a monitor and go, no separate case or wiring |
Compute Module 5 (CM5) | Custom embedded products, industrial and commercial deployment | System-on-module version of the Pi 5 for your own carrier board, built for production, not breadboard prototyping |
If you’re not sure where to start, a standard Pi 4 or Pi 5 covers the vast majority of learning projects. Move to a Zero 2 W once power and size actually matter, and only look at the Compute Module once you’re designing something you intend to manufacture.
Raspberry Pi vs. Microcontrollers: When Should You Use Each?
This is the question that trips up a lot of people moving between the Arduino/embedded world and the Pi world, and it’s worth answering directly instead of vaguely.
Factor | Raspberry Pi | Microcontroller (STM32, 8051, Arduino) |
Operating system | Full Linux (multitasking) | None, or a lightweight RTOS |
Real-time response | Not guaranteed, OS scheduling introduces delay | Deterministic, down to microsecond-level timing |
Power consumption | Higher, typically a few watts | Very low, often milliwatts, especially in sleep modes |
GPIO logic voltage | 3.3V, and not 5V tolerant | Varies, 5V is common on classic Arduino and 8051 boards |
Boot time | Seconds, for a full OS boot | Instant, essentially |
Best suited for | Networking, storage, vision, multitasking | Precise timing, sensors, battery-powered devices |
The short version: reach for a Raspberry Pi when a project needs an operating system, networking, or real processing power. Reach for a microcontroller when you need precise timing, long battery life, or you’re deploying at a scale where a few dollars per unit actually matters. A lot of production embedded products use both, a microcontroller handling real-time control, talking to a Pi or Compute Module that handles the network and user-facing side. And one gotcha worth remembering either way: the Pi’s GPIO pins run at 3.3V and are not 5V tolerant, so feeding a 5V signal straight into a GPIO pin without level shifting can damage the board, a mistake that catches a fair number of people coming over from 5V-logic microcontrollers.
Can Raspberry Pi Be Used as a Real-Time Controller?
Raspberry Pi can control hardware, but standard Linux operation is not inherently deterministic in the same way as a dedicated real-time microcontroller system.
This matters when timing requirements are strict.
For example, applications involving highly precise timing, fast control loops, or deterministic response may require:
- A microcontroller
- A real-time operating system
- Specialized real-time software architecture
- Dedicated hardware peripherals
A Raspberry Pi can still handle higher-level tasks while another controller manages time-critical operations.
This architecture is common in systems where Linux-based processing and deterministic control are both required.
What Should Engineers Consider Before Using Raspberry Pi?
Before choosing Raspberry Pi for a project, check the actual system requirements.
1. Processing requirements
Estimate how much processing the application needs, especially for:
- Image processing
- Data analysis
- Multiple services
- Databases
- Network traffic
2. Real-time requirements
Determine whether the application has strict timing constraints.
If missing a deadline can affect system operation, evaluate whether a general-purpose Linux system is appropriate.
3. Power consumption
Raspberry Pi generally consumes more power than a small microcontroller-based design.
This is important for battery-powered devices.
4. Storage reliability
If the system writes data frequently, storage design should be considered carefully.
Unexpected power loss and frequent writes can affect a storage device over time. Production systems may need additional protection and a suitable storage strategy.
5. Electrical interfacing
Check:
- GPIO voltage requirements
- Logic-level compatibility
- Current limits
- Sensor interfaces
- Isolation requirements
Never assume that a GPIO pin can directly drive every external device.
6. Product lifecycle
For commercial products, consider hardware availability, software maintenance, security updates, supply planning, and long-term support.
Advantages and Limitations of Using a Raspberry Pi
Advantages
- A full Linux OS gives you access to a huge software ecosystem, Python, C/C++, Node.js, and existing Linux tools, instead of writing everything from scratch
- Built-in networking (Wi-Fi, Bluetooth, and Ethernet on most models) without extra hardware
- A large community and years of documentation, so most problems you run into have already been solved by someone else
- GPIO, USB, and HDMI on one board means it bridges “regular computer” tasks and “physical hardware” tasks
- Reasonable cost for the capability, compared to building an equivalent custom Linux system from scratch
Limitations
- Not a real-time system, Linux task scheduling means you can’t guarantee microsecond-level timing, which rules it out for hard real-time control like precise motor loops or safety-critical timing
- No built-in analog-to-digital converter, you need an external ADC chip to read analog sensors directly, unlike most microcontrollers
- Higher power draw than a microcontroller, which matters for battery-powered or solar-powered projects
- SD card storage, where used, is a common point of failure in always-on projects if you don’t manage writes carefully
- GPIO pins are 3.3V and not 5V tolerant, so connecting 5V hardware directly can damage the board.
Conclusion
The Raspberry Pi earns its reputation not because it’s the best tool for any single job, but because it’s flexible enough to be a genuinely good tool for dozens of different ones. Looking across the uses for a Raspberry Pi covered here, the pattern holds: it wins whenever a project needs an operating system, networking, or general-purpose processing, and it loses whenever a project needs precise, low-power, real-time control. Once you know which side of that line your project falls on, picking the right model, or deciding a microcontroller is actually the better fit, gets a lot easier.