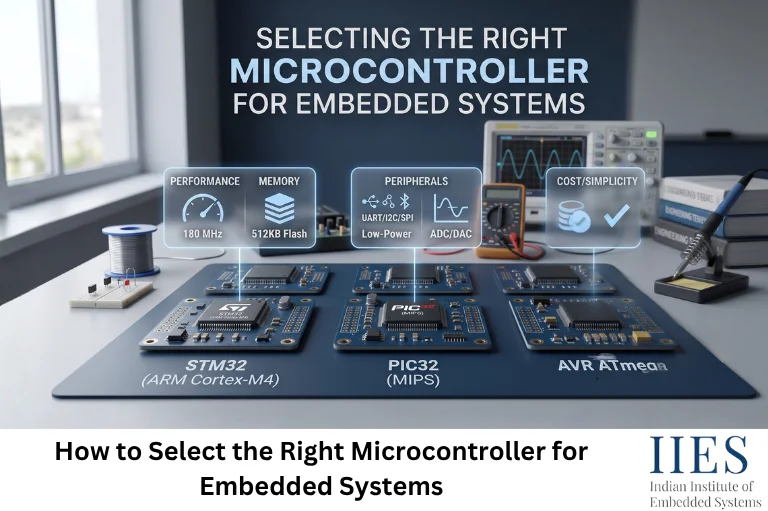
Why Your Microcontroller Choice Matters More Than It Seems
Swapping a microcontroller mid-project is rarely just a part substitution. It touches your firmware, your PCB layout, your certifications, and sometimes your entire toolchain.
Getting the decision wrong tends to show up as:
- Redesign risk – requirements outgrow the chip’s memory, I/O, or radio capability partway through development
- Security exposure – a missing secure boot or crypto engine turns into a compliance blocker late in the project
- Supply risk – the part gets discontinued right when you’re scaling production
- Wasted budget – you over-specced for “might need it later” features that never got used
Getting it right the first time is almost always cheaper than getting it right the second time.
Step 1: Start With Requirements, Not the Chip
Before you open a single datasheet, write down what your project actually needs. This single habit eliminates more bad microcontroller choices than any spec comparison ever will.
Define Your I/O and Interface Needs
- GPIO count, plus headroom for future revisions
- Communication protocols: SPI, I²C, UART, CAN, USB
- Analog needs: ADC/DAC resolution and channel count
- Display or touch interface requirements
- Rough Flash and RAM budget based on your application plus your wireless stack
- Whether you need offline data buffering – a common requirement (and easy to underestimate) when a device has to keep working without a live network connection
- External storage needs: SD card, SPI flash, or EEPROM
Define Your Connectivity Requirements
- Which protocols you actually need: Wi-Fi, BLE, NFC, cellular, LoRa
- Whether you need simultaneous Wi-Fi and BLE, or just one at a time
- A hard truth worth planning around early: very few chips bundle Wi-Fi, BLE, and NFC natively – NFC is almost always added through a separate companion chip

Step 2: Match Performance to Your Real-Time Needs
Clock speed alone tells you very little. What actually matters:
- Core architecture – Cortex-M0/M0+ for simple control tasks, M4/M33 for a good performance-to-power balance, M7 when you need serious compute headroom
- FPU requirements – needed for sensor fusion, filtering, or any real-time signal processing
- Interrupt latency – critical if you’re driving motors, decoding fast protocols, or doing anything timing-sensitive
- RTOS or bare-metal – bare-metal works fine for simple, single-task firmware; once you’re juggling networking, sensors, and a UI with real deadlines, an RTOS like FreeRTOS or Zephyr usually pays for itself quickly
Step 3: Budget Your Power Envelope
Power budgeting is where a lot of wireless designs go wrong, not because engineers ignore it, but because they check the wrong number.
- Decide upfront: battery-powered or mains-powered, and what battery life you’re promising customers
- Compare active current and deep-sleep current, vendors love to lead with the sleep number
- Remember that radio activity is usually the single biggest power draw in a wireless design, so check the datasheet’s Wi-Fi-active and BLE-advertising current figures specifically, not just idle numbers
Step 4: Make Security Non-Negotiable From Day One
Security bolted on at the end of a project is security done badly. At minimum, confirm your candidate chip supports:
- Secure boot and signed firmware
- Hardware-backed key storage, Physically Unclonable Function (PUF)-based keys are increasingly standard
- Signed, authenticated OTA updates
It’s also worth knowing a chip’s entire command surface, not just its documented one. In 2025, independent security researchers publicly disclosed 29 undocumented Bluetooth HCI commands present in ESP32 chips (tracked as CVE-2025-27840), including one capable of direct memory writes. Espressif assessed the practical risk as low and committed to removing the undocumented commands in firmware, but the episode is a good reminder that thorough security review matters regardless of which country a chip vendor is based in.
That said, country of origin is a real factor in some procurement conversations. Organizations in government, defense, or other regulated sectors sometimes apply sourcing policies that add scrutiny to components from specific countries, including China-based vendors like Espressif. Whether or not that applies to your project, it’s worth confirming early — it can rule out an otherwise strong candidate before you’ve invested engineering time in it. Chips like Nordic’s nRF54H series (PSA Certified Level 3) and NXP’s RW612 (SESIP Level 3 and PSA Level 3 certified) are two examples built with this kind of scrutiny in mind from the start.
Step 5: Untangle Your Wireless Connectivity Trade-offs
Not all “Wi-Fi + BLE” microcontrollers are architected the same way, and the difference matters for your BOM and your board layout.
- Integrated single-chip designs (ESP32, NXP’s RW610/RW612) put the application processor and the radios on one die, simpler layout, fewer parts
- Host-plus-companion designs (Nordic’s nRF52/53/54 paired with an nRF70 Wi-Fi companion IC; TI’s SimpleLink CC33xx paired with your own host MCU) let you keep a microcontroller you already trust while adding wireless separately
- Shared-radio contention is a real, often-missed gotcha: some combo chips use a single 2.4 GHz radio for both Wi-Fi and BLE, so pushing both hard at once can degrade one or both. Load-test this yourself, don’t assume it from the datasheet
- NFC stays separate almost everywhere. Even vendors with strong Wi-Fi/BLE silicon (NXP, ST) sell NFC as its own product line (NXP’s NTAG/PN7150 family, ST’s ST25 series) rather than folding it into the same chip
Step 6: Evaluate the Development Ecosystem
A chip with perfect specs and a painful toolchain will cost you more time than a slightly-less-perfect chip with excellent tooling.
- SDK and HAL quality – does the vendor’s software actually match what the datasheet promises?
- Debug tooling – SWD/JTAG probe support, RTOS-aware debugging
- Community and documentation depth – how easy is it to find an answer at 11 p.m. before a deadline?
- Reference designs and eval boards – a good starting board can save weeks
Step 7: Plan for the PCB, Not Just the Chip
Two chips with identical specs can be wildly different to actually lay out.
- Some vendors group peripheral pins logically; others interleave them in ways that complicate routing
- Package choice matters: QFN packages are friendlier for most assembly houses than fine-pitch BGA
- Antenna placement and matching-network requirements for the radio need to be planned from the first layout, not bolted on later
Step 8: Protect Your Production Timeline
A microcontroller that gets discontinued mid-production is one of the most avoidable failure modes in embedded design.
- Check the manufacturer’s longevity commitment, 10 to 15 years is a reasonable ask for anything going into industrial or long-lifecycle products
- Understand where the part sits in its own lifecycle: brand-new silicon often means better features but thinner field history; mature parts mean well-documented errata and safer supply
Step 9: Weigh Cost Against Your Real Budget Model
- Price your actual production volume – unit economics at 100 units look nothing like unit economics at 100,000
- Total system cost, not just chip price: companion radios, antennas, secure elements, and certification fees all add up
- Institutional and industrial buyers often weight long-term support over unit price; high-volume consumer products often flip that priority entirely

Step 10: Don’t Undervalue What Your Team Already Knows
Familiarity is a legitimate selection criterion, not a lazy shortcut.
- A platform your team already knows reduces schedule risk and bug count in ways a spec sheet can’t capture
- “Use what you know unless you have a specific, written reason not to” is a genuinely sound default
- The reason to break from it should be concrete: a hard requirement, a security certification, a power budget, a radio protocol, that your familiar platform truly can’t meet
Popular Wireless MCU Families at a Glance
Family | Wireless | Architecture | Good to Know |
Espressif ESP32 | Wi-Fi + BLE, single chip | Xtensa/RISC-V with integrated app core | Huge community, low cost, fast prototyping; Espressif is China-based, which matters for some sourcing policies |
Nordic nRF52/53/54 + nRF70 | BLE native; Wi-Fi via nRF70 companion IC | Arm Cortex-M4/M33 (plus a RISC-V core on nRF54) | Best-in-class BLE power efficiency; nRF54H20 supports PSA Certified Level 3 security |
NXP RW610 / RW612 | Wi-Fi 6 + BLE 5.4 (RW612 adds 802.15.4), single chip | Arm Cortex-M33 @ 260 MHz with TrustZone-M | Strong built-in security (SESIP L3, PSA L3, PUF-based keys); no integrated NFC |
ST STM32WB / STM32WBA | BLE 5.4 + 802.15.4 (Zigbee/Thread/Matter); no integrated Wi-Fi | Dual-core Cortex-M4+M0+ (WB) or Cortex-M33 (WBA) | Deep STM32 tooling familiarity if you’re already in that ecosystem; pair with an external module for Wi-Fi |
TI SimpleLink CC33xx | Wi-Fi 6 + BLE 5.4, companion device | Pairs with your own host MCU/MPU over SPI/SDIO/UART | Keep your existing host chip and bolt on wireless separately; rated to 105°C for industrial use |
Silicon Labs (EFR32 series) and Infineon (AIROC series, formerly Cypress) are two more established options worth a look, especially if your project needs Zigbee or Thread mesh support alongside Wi-Fi/BLE. If geographic sourcing diversity matters for your supply chain, Realtek’s Taiwan-based Ameba series is another combo option some teams consider.
Should You Always Use the Most Powerful Microcontroller?
No.
A higher-performance MCU may provide more processing capability, but that does not automatically make it the right device.
A better question is:
Does the microcontroller provide enough capability for the application, with suitable margin, power consumption, cost, software support, and lifecycle?
For a small sensor node, a high-end processor could add unnecessary cost and power consumption.
For an advanced IoT gateway, the same processor may not be sufficient.
The right MCU depends on the system.
Should You Always Choose a Familiar Microcontroller?
Familiarity can reduce risk, but it should not override important requirements.
A familiar MCU may offer:
- Faster development
- Existing firmware expertise
- Existing debugging knowledge
- Reusable code
- Familiar development tools
- Lower training effort
However, a new MCU may be justified when it provides a major advantage in:
- Power
- Wireless capability
- Security
- Performance
- Cost
- Lifecycle
- Availability
The Reddit discussion captured this practical balance: teams often start with what they already know, but production designs may later move to a more optimized platform once requirements become clearer.
Your Microcontroller Selection Checklist
- Write down I/O, memory, and connectivity requirements before opening a datasheet
- Confirm performance and real-time needs – core, FPU, interrupt latency, RTOS or bare-metal
- Check active and sleep current against your real power budget, not just the headline sleep number
- Verify secure boot, hardware key storage, and signed OTA support
- Decide between an integrated wireless chip and a host-plus-companion-radio design
- Load-test simultaneous Wi-Fi/BLE use if your chip shares a single radio
- Evaluate the SDK, debug tools, and community support, not specs alone
- Confirm PCB layout friendliness and antenna requirements
- Check the manufacturer’s longevity commitment and lifecycle stage
- Price your actual production volume, not a rough guess
- Default to your team’s existing familiarity unless a hard requirement rules it out
Common Mistakes to Avoid
- Chasing the newest chip instead of your actual requirements
- Ignoring long-term availability until it becomes a production emergency
- Assuming full-throughput Wi-Fi and BLE simultaneously without testing the shared-radio behavior
- Treating security as a checkbox to add right before launch instead of a day-one requirement
- Underestimating a bad toolchain – a rough IDE or thin SDK slows a team down far more than most spec sheets suggest
- Skipping a real bill-of-materials exercise until the design is nearly frozen

Conclusion
The engineers who consistently pick the right microcontroller aren’t the ones who’ve memorized every datasheet on the market, they’re the ones who write down what they actually need before they start comparing chips. Requirements first, shortlist second, familiarity and tooling as your tiebreaker.
Get that order right, and the “ESP32 or STM32 or NXP” debate mostly answers itself.