Why Sensor Integration Matters in Arduino Projects
Before diving into the technical steps, it’s important to understand the value of sensors.
Without sensors, Arduino is just a programmable board. With sensors, it becomes an intelligent system capable of:
- Monitoring environmental conditions
- Making real-time decisions
- Automating tasks
- Enabling IoT applications
For example:
- A temperature sensor can trigger a fan
- A motion sensor can activate security alerts
- A moisture sensor can automate irrigation
This is why understanding the integration of sensors and actuators with Arduino is critical for building real-world systems.

Understanding Sensors
What Are Sensors?
A common question beginners ask is: what are sensors and how do they work?
A sensor definition in simple terms:
A sensor is a device that detects physical or environmental changes and converts them into electrical signals.
These signals are then processed by microcontrollers like Arduino or STM32.
Sensor Working Principle
The sensor working principle is based on detecting physical changes such as:
- Temperature
- Light intensity
- Motion
- Pressure
- Humidity
The sensor converts these into measurable electrical outputs (voltage, current, or digital signals).
Types of Sensors in Arduino
Understanding the types of sensors in Arduino helps you choose the right one for your project.
1. Analog Sensors
- Output: Continuous signal
- Example: Temperature sensor
- Arduino reads values between 0–1023
Use case:
- Monitoring temperature variations
- Light intensity measurement
2. Digital Sensors
- Output: Binary (HIGH or LOW)
- Example: Push button, motion sensor
Use case:
- On/off detection
- Motion-triggered systems
3. I2C and SPI Sensors
These are advanced communication-based sensors.
Protocol | Pins Used | Use Case |
I2C | SDA, SCL | Multiple devices, simple wiring |
SPI | MOSI, MISO, SCK | Faster communication |
Use case:
- Complex IoT systems
- Multi-sensor integration
Analog vs Digital vs I2C vs SPI Sensors
To better understand the differences between sensor types used in Arduino projects, here’s a quick comparison:
Feature | Analog | Digital | I2C | SPI |
Signal Type | Continuous | Binary (HIGH/LOW) | Data packets | High-speed data |
Pins Used | 1 (Analog pin) | 1 (Digital pin) | 2 (SDA, SCL) | 3–4 (MOSI, MISO, SCK, SS) |
Complexity | Low | Low | Medium | High |
Accuracy | Medium | High | High | Very High |
Use Case | Basic sensing (temperature, light) | Switching, detection | Multi-sensor systems | High-speed applications |
Arduino Sensor List
Here’s a quick Arduino sensor list used in real projects:
- Temperature Sensor (LM35, DHT11)
- Ultrasonic Sensor (HC-SR04)
- PIR Motion Sensor
- Light Sensor (LDR)
- Soil Moisture Sensor
- Gas Sensor (MQ series)
These sensors form the foundation of most Arduino sensor projects.
Sensor Selection: Choosing the Right Sensor
Selecting the correct sensor directly impacts your project’s performance.
Key Factors to Consider:
- Type of Measurement: Temperature, humidity, etc.
- Accuracy & Precision: Required reliability level
- Range: Measurement limits
- Interface: Analog, Digital, I2C, SPI
- Power Requirements: 3.3V or 5V compatibility
Expert tip:
Choosing the wrong sensor can lead to inaccurate results even if your code is perfect.
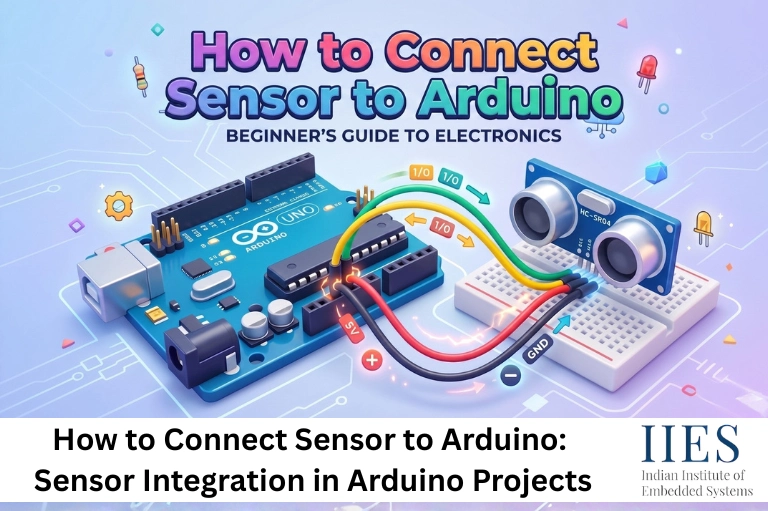
Connecting Sensors to Arduino
This is the most critical step in learning how to connect sensor to Arduino.
Wiring Basics
Most sensors have 3 main pins:
- VCC (Power)
- GND (Ground)
- Data Pin
Analog Sensors Connection
- Connect data pin → Analog pins (A0–A5)
- Output → Continuous values
Digital Sensors Connection
- Connect data pin → Digital pins
- Output → HIGH / LOW
I2C/SPI Sensors Connection
- I2C → SDA, SCL
- SPI → MOSI, MISO, SCK
These allow multiple sensors to work together efficiently.
Power Considerations
- Ensure correct voltage (3.3V or 5V)
- Incorrect power can damage sensors
- Use external power if required
Step-by-Step: How to Connect Sensor to Arduino
Now that you understand the basics of connecting sensors to Arduino, let’s break it down into a simple, practical workflow you can follow for almost any sensor.
- Identify the Sensor Type
Determine whether your sensor is analog, digital, or uses communication protocols like I2C or SPI. This will decide how you connect and read data from it. - Check Voltage Requirements
Verify whether the sensor operates at 3.3V or 5V. Supplying incorrect voltage can damage the sensor or lead to unstable readings. - Connect VCC and GND Properly
Always start by connecting the power pins correctly:- VCC → Arduino 5V or 3.3V
- GND → Arduino GND
- Connect Data Pin to the Correct Arduino Pin
- Analog sensors → A0 to A5
- Digital sensors → Any digital pin
- I2C → SDA and SCL
- SPI → MOSI, MISO, SCK
- Upload Basic Test Code
Use simple code with analogRead() or digitalRead() to check if the sensor is working. - Read and Verify Output in Serial Monitor
Open the Serial Monitor in the Arduino programming software to observe real-time sensor values. - Calibrate the Sensor if Needed
Adjust readings based on known values to improve accuracy, especially for temperature, gas, or moisture sensors. - Apply Logic (Thresholds or Conditions)
Use the sensor data to trigger actions, such as:- Turning ON an LED
- Activating a motor
- Sending alerts

Programming the Arduino
Once hardware is ready, the next step is programming the Arduino.
Arduino Programming Software
You’ll use the Arduino programming software, commonly known as the Arduino IDE.
What is the Arduino Programming Language?
If you’re wondering what is the Arduino programming language, it is based on:
- C / C++
- Simplified for beginners
Reading Sensor Data
- analogRead() → Reads analog values
- digitalRead() → Reads digital signals
Using Libraries
For advanced sensors:
- Install libraries from Arduino IDE
- Simplifies communication (especially I2C/SPI)
Example:
Temperature sensors often require libraries for accurate readings.
Common Problems When Connecting Sensors to Arduino
Even after correctly wiring and programming, you may face issues while working with sensors. Here are some common problems and how to fix them:
- Sensor not giving output
This usually happens due to incorrect wiring. Double-check VCC, GND, and data pin connections. - Random or fluctuating values
This can be caused by electrical noise or poor grounding. Use shorter wires and ensure proper grounding. - Incorrect or unstable readings
Calibration may be missing. Many sensors require calibration to provide accurate results. - Arduino not detecting the sensor
The data pin may be connected to the wrong pin, or the wrong pin is defined in the code. - Sensor heating or not working properly
This often indicates incorrect voltage supply. Always verify whether the sensor requires 3.3V or 5V. - I2C/SPI sensor not responding
Ensure correct pin connections (SDA/SCL or MOSI/MISO/SCK) and check if the required library is installed.
Interpreting Sensor Data
Raw data is not always useful directly.
Signal Processing Steps:
- Calibration → Adjust accuracy
- Filtering → Remove noise
- Conversion → Convert into meaningful units
Example:
Convert analog value → Celsius temperature
Thresholds and Triggers
Used for automation:
- Turn ON LED if temperature > 30°C
- Activate alarm if motion detected
This is where sensor data becomes actionable.
Performance Optimization Tips for Accurate Sensor Readings
Once you start working with real-world data, you’ll notice that sensor readings are not always perfectly stable. To improve accuracy and reliability in your Arduino projects, follow these practical optimization techniques:
How to Improve Sensor Accuracy
- Use Proper Shielding
External electromagnetic interference can affect sensor readings. Using shielded cables or proper enclosure helps reduce noise. - Avoid Long Wires
Long wires can introduce signal loss and noise. Keep connections as short as possible for better stability. - Use Capacitors for Noise Filtering
Adding capacitors across power lines can help smooth out fluctuations and reduce unwanted noise in sensor signals. - Take Multiple Readings and Average Them
Instead of relying on a single reading, take multiple readings and calculate the average to get more stable and accurate values. - Use Proper Libraries
Many sensors have dedicated libraries that handle data filtering, calibration, and communication efficiently.
These techniques are especially useful in advanced Arduino sensor projects, where precision and consistency are critical.
Practical Arduino Sensor Projects
Here are some simple yet powerful Arduino sensor projects:
1. Temperature Monitoring System
- Sensor: LM35
- Output: Display temperature
2. Smart Irrigation System
- Sensor: Soil moisture
- Action: Water plants automatically
3. Motion Detection Alarm
- Sensor: PIR
- Action: Trigger buzzer
4. Smart Light System
- Sensor: LDR
- Action: Auto ON/OFF lights
Real-World Use Case
Consider a smart home system:
- Temperature sensor → Controls AC
- Motion sensor → Controls lighting
- Gas sensor → Detects leaks
This demonstrates the integration of sensors and actuators with Arduino in real-world applications.
Future Trends (2026 and Beyond)
Sensor integration is evolving rapidly with:
- AI-based sensor systems
- IoT-enabled smart devices
- Wireless sensor networks
- Edge computing
Arduino continues to be a strong entry point into these technologies.
Best Practices for Sensor Integration
- Always calibrate sensors
- Avoid electrical noise
- Use proper shielding
- Test sensors individually
- Use stable power supply
Common Mistakes to Avoid
- Wrong pin connections
- Ignoring voltage compatibility
- Not using libraries properly
- Skipping calibration
- Misinterpreting sensor data

Conclusion
Mastering how to connect sensor to Arduino is a foundational skill for building intelligent electronic systems. From understanding the sensor working principle to programming the Arduino, every step plays a crucial role in creating reliable and efficient projects.
As technology moves toward IoT and automation, the ability to integrate sensors effectively will open doors to advanced innovations and career opportunities in embedded systems.